Showing posts with label Pasta/Rice/Noodles. Show all posts

Monday, 30 January 2012

Kofta Pulao


I am a rice fanatic and would try anything that has something to do with rice that I find appealing. Like wheat, rice too is versatile in its own way, making one of the best non gluten substitutes. Back home we make innumerable amount of  preparation using rice and have them throughout the day right from morning through to dinner in different forms such as pathiris, neypathal, simple rice etc. While some dishes require less skill, some others require laborate and long process and a better hand on experience. My favourite among rice platters have always been Biryanis and pulaos. The amount of flavours packed in them is just magical. Even though preparing them take up quite a big chunk of time, it is worth every effort and time. Making rice to its perfection is quite an art; it is one of the simplest things to make, yet something that needs the knack to get it right. In spite of making rice for several years now, I still screw it up at times. 


I would try any rice dish that sound and look appealing. That was when I came across Soma’s Zafrani kofta pulao. She presents her dish beautifully to begin and with all the writings and explanation, you are just ready to eat that platter. My recipe here is not very different; it is very much inspired and adapted from Soma and the outcome was better than I expected. My expectations are always very high and not less than perfect!? I just tweaked a bit to add my personal touch and to adjust with some of the ingredients that are not a regular ingredient in my pantry, like the saffron. I also prepared rice as our humble ghee rice, because that’s one way that never fail to get right and one that I make often. But it took me quite some time to prepare this pulao as some steps in the making takes very long time like frying onions to brown. But Soma mentions that kofta and onions can be prepared ahead of time, which divides the intensity of labour and time you stand at the hob. She also mentions that koftas could be used as starters, filling up pitta pockets along with some salad leaves, some mint chutney, yogurt etc which I regularly do with my Moroccan meatballs (yet to shoot, type and blog!).


Delicious Kofta  Pulao
Serves 6

Ingredients:


For fried onions:

5 medium onions sliced into half moon shapes/5 cups
¼ cup oil
a pinch of salt

For Koftas:
500g lamb mince/beef mince
1/3 cups finley chopped onion
1 tbsp minced ginger
1 tbsp minced garlic
2 tbsp chopped mint leaves
2 tsp garam masala powder
1 ½ - 2 teaspoon Kashmiri chilli powder
3 ½ tbsp corn flour
½ teaspoon freshly cracked black pepper
1 tsp coriander powder
¾ -1 tsp salt
3 tbsp double cream
2 tbsp or more vegetable oil to fry the koftas

For Rice:
3 cups basmati rice, washed in several changes of water and soaked to 20 minutes before cooking
4 ½ cups boiling water
salt to taste
¼ cup ghee (clarified butter)
2 black cardamoms
4 green cardamoms
4 cloves
½ tsp black pepper corns
2 tbsp raisins
2 tbsp almonds
2 bay leaves
3 teaspoons rose water
1-1 ½  teaspoons garam masala powder
½ cup chopped mint leaves


Preparation:
For fried onions:
1.Rub salt in to the sliced onion using fingers or just sprinkle salt onto onions and toss it with a large spoon. Heat oil in a large wok or frying pan. When hot, throw in onions and fry them in 1-2  batches until brown. Make sure the pan is on medium heat and stir occasionally to avoid charring and onions sticking to the pan. once brown, fish them out and drain on kitchen paper. Sprinkle 1 teaspoon of garam masala all over the fried onions and mix it with spoon. Keep it covered for later use.

For Koftas:
1.Combine all the ingredients for koftas except oil using a wooden spoon. I feel mixing it with hand blends and distribute the ingredients better.  Divide the mixture into 25-30 portions and roll it into smooth balls.
2. Heat oil in a non stick pan and fry these koftas until golden on medium heat, flipping sides gently. I used lamb here and it took me around 12-15 minutes per batch of meat balls. Don’t get tempted to increase the heat assuming the meat to cook faster. It would brown the meat from outside leaving the inside uncooked. So keep the heat to medium or lower. You can also bake these Koftas for 20-25 minutes until golden in a preheated oven at 180 degrees Celcius, stirring once or twice in between. Once done, keep them aside.

For rice:
1. Place a wide, non-stick saucepan on low-medium heat and add ghee. When ghee has melted and is hot, add whole spices and almonds and sauté for a minute or two until it is fragrant. Lastly add raisins and stir just until they puff up.
2. Add 1/3rd of fried onions and mix well.
3. Add drained rice to this spiced ghee and sauté for further 4-5 minutes or until the rice is glistened with oil and onions are equally distributed.
4. Add boiling water and required amount of salt and stir well. At this point of time, it is important to turn the heat up to high. Keep the pan open and cook until you see NO visible water in the bottom of the pan when you part rice with a ladle. At this point, when water is all evaporated, reduce the heat to minimum, cover the pan with a tight fitting lid to hold in all steam and cook on very low heat for 8-10 minutes minutes or until rice is perfectly cooked. Once it is completely done, toss rice with a spatula once or twice to avoid rice grains sticking to each other.

Final assembly of the pulao:
1.Divide the koftas into 2 part and rice into 3 parts  OR take away two parts of rice from the non stick pan in which the rice was cooked and keep one part of rice in the pan to do the layering.
2. That is going to be the first layer of rice. Sprinkle on it, some spiced fried onions, some chopped mint and a teaspoon of rose water. Then, distribute one part of koftas on top of this.
3. Scatter the second part of rice over these koftas,onions etc. Again, sprinkle some spiced fried onions, chopped mint leaves and a teaspoon of rose water all over and distribute the second part of koftas on top.
4. Scatter the last part of rice to cover up the underlying koftas and sprinkle rest of onions, mint leaves and rose water and a good pinch of  garam masala. Cover the pan tight, and place it on the lowest heat for about 10 -15 minutes to infuse the flavour.
5. Open the pan, gently toss the rice over with a spatula to mix and serve hot with any pickle, raita, pappadam and some salad.

Friday, 15 October 2010

Simple Vegetable Pulao/Pilaf


Here is another simple rice preparation that I made recently. Easy to put together and tastes divine. Recently I was watching Master chef program where the contestants had to prepare pulao and none of the participants go it right! Some were undercooked, some were chewy and some were soft outside and crunchy inside. Most of the mistakes would have occured as they were preparing it under pressurised circumstances and the nerves would have just got better of them. Anyways, preparing rice is one of the easiest thing to do if the instructions are clearly followed, and something that can be messed up easily if not prepared appropriately as well. It can be intimidating to many and it can take quite a few trials to get it right. But you will get there one day.


My initial attempts of rice making were a disappointment to see as well as eat. My first rice used to be cakey, something that could b easily cut into shapes. Sometimes it took the other edge being like porridge or a soup. Sometimes undercooked and sometimes overdone. Nothing seemed so hard than preparing rice. I am not talking about the complex biriyani or pilaf here, it’s just the plain rice. Oh, it was a hard time. It took me umpteen trials to perfect it. But once you get the hang of it, it is just a piece of cake.

What I learnt from all these years experience is that while cooking rice, heat adjustment is one of most significant factor. It should be adjusted at the right time. Then comes the water quantity. Water quantity slightly differs depending on if you have soaked the rice prior to cooking or if you are using rice right out of the packet (Well, you have to wash before using). You can use lot of water to cook, and then drain rice once they are cooked, or add just enough water for the rice to cook in without having water to be drained. Rice can be cooked in number of ways; every one would have their own means of cooking. But this is one method that I come back to all the time, as it gives me just the right outcome, just the way I want it. Soft, fluffy and each grains separated. Just follow simple steps, do the flame adjustment properly, if you don’t get it right for the first couple of times, you sure will get it right quick. Believe me, this method would be one of the easiest way to cook rice once u get the hang of it.


Simple Vegetable Pulao/Pilaf
Serves 3-4

Ingredients:
2 cups Basmati Rice
3 cups boiling water
Salt to taste
1 large carrot finely chopped (3/4 cup, 120g)
½ cup frozen peas, thawed
¼ cup onion finely chopped (optional)

Whole spices:
2 whole black cardamoms
2 bay leaves
4 cloves
3 small pieces (1” long) cinnamon stick
¾ teaspoon cumin seeds
4 Tablespoon clarified butter (Ghee)


Preparation:

1.Wash rice and soak it for about ½ hour - 1 hour. Place a wide, non-stick saucepan on low-medium heat and add ghee. When ghee has melted, add whole spices and sauté for 30-40 seconds or until it leaves aroma.

2. Increase the heat to medium and add vegetables and sauté for 3 minutes stirring frequently.

3. Add drained rice to these vegetables and sauté for further 3 minutes.

4. Add boiling water and required amount of salt and stir well. At this point of time, it is important to turn the heat up to high. Keep the pan open and cook until you see NO water floating in the bottom of the pan when you part rice with a ladle. Make sure rice doesn’t get really dry here as it needs moisture to get it cooked. As soon as you see no water is left in the pan, reduce heat, cover the pan tight to hold in all steam and cook on very low heat for 10-15 minutes or until rice is perfectly cooked. Once it is completely done, toss rice with a spatula once or twice to avoid rice grains sticking to each other.

Serve hot with any spicy curries.

Notes:

You can use your own choice of vegetables here, including green beans, cauliflower etc..

Saturday, 25 September 2010

Lime Rice (Elumichham Pazham Saadham)


Lime rice is also mostly known as lemon Rice where lemon and Lime is considered or mistaken for other. This is a very popular and flavourful rice preparation of Tamil Nadu, South India. It is tempered with lentils, nuts, chillies, leaves etc, leaving behind all its flavours in the rice. It can be served on its own, or have it with yogurt, pickle and Pappadums. You can also serve with some spicy non-vegetarian curries like Malabar Chicken Curry  , Chicken Fry Masala , Beef Ularthiyathu ,  Mutton Buhari , Mutton Ularthiyathu, and my favorite combination  Chicken Chettinadu .


Lime Rice (Elumichham Pazham Saadham)
Serves 6-8

Ingredients:

3 cups (600g) Basmati rice (Kolam Rice is used in the traditional preparation.)
Salt as required
Boiling water-
1 ½ tbsp Channa Dal, soaked in hot water for ½ hour *
1 tsp mustard seeds
1 ½ teaspoon ground turmeric **
3 dried red chillies
2 green chillies
2 teaspoon Urad Dal
½ cup broken cashew nuts or peanuts
2 sprigs curry leaves
¼ tsp asafoetida/hing/Kaaram
1/3 cup coconut oil/ghee
2 Tbsp lime juice***


Preparations:

1. Wash rice well. Bring a large pan of water to boil and add required amount of salt. Add rice and cook by keeping the lid open until done. Make sure there is lot of water for teh rice to move around and  take care not to overcook. Drain rice in a large colander.

2. In a large non-stick saucepan (I used the same pan that I used for cooking rice, used it after washing it.) heat oil. Fry broken cashew nuts or peanuts until golden. Take them out using a slotted spoon and drain on kitchen towel. Similarly fry the soaked and drained channa dal until golden and keep them long with fried cashews/peanuts.

3. In the same oil, splutter mustard. Add urad dal and fry till golden. Add curry leaves, red chillies and sauté for few seconds.

4. Add turmeric and asafoetida and sauté for 30 seconds on low-medium heat.

5. Add rice, fried nuts and dal and mix well.

6. Add lime juice and mix well. Cover and cook for 1-2 minutes. Serve hot/ warm with any spicy curry or along with curd and pickle.


Notes:

* Channa dal is normally added without soaking and is hard when fried dry. To avoid the hard bite, it can be soaked for sometime, drained and then pat dried before using.

** You can reduce turmeric to ½ teaspoon or 1 teaspoon to make it less yellowy.

*** Lemon juice can also be added instead of lime. Increase it as per your taste. The amount of lemon juice gives it just a milder lemony taste.

Tuesday, 15 June 2010

Coconut rice – South Indian style.


Coconut rice is a very popular rice preparation from Southern part of India where coconut is found in abundance in almost every household. In south Indian cooking, anything and everything including gravies, dry curries, rice varieties, snacks, sweets etc mostly uses coconut in different forms at different stages of its maturity. Juice from the tender coconut is used as a refreshing summer drink and the flesh is scooped and eaten. Sometimes the flesh is blended along with the juice for a delicious drink. Mature coconuts are peeled, the shell is then cracked, and the flesh is then grated using a coconut grater, a handy tool designed specially for grating coconut. In the western countries, you might not be able to find the coconut scraper. In that case all what you can do it, place the whole coconut (Husk removed) on flame turning all sides for around 5 minutes. It works well on electric hobs as well. Due to high heat, the shell will loosen from the flesh and start to crack. Drain the coconut water off or drink if if you wish. Cover the heated coconut in a cloth and Crack open the shell using a rolling pin. Covering the coconut using cloth will prevent any mess that occurs while cracking the shell. The flesh can then directly be grated using our regular vegetable box grater and the flesh can be frozen infinitely.

Grated coconut in used in many dishes as it is to give a sweet bite. Mature coconuts are scraped for flesh which is then ground to extract milk which is used in many savoury dishes to impart a rich and sweet taste. It is also used in many desserts and puddings or payasams. It is also famous being used in cookies, tart and cakes. Coconut at later stage is sun dried where oil is then extracted from them and is used for everyday cooking and frying! Now for ease of use, you get coconut in all processed form - readymade coconut milk in cans, coconut in desiccated form and coconut powders that can be just mixed with hot water to produce coconut milk and even coconut cream. Freshly grated coconuts are also available widely in frozen form mainly in the Asian stores. All these processed form of coconut tastes good, but nothing would beat the fresh coconut taste. That’s just a general info for my non-Indian readers here. Here you go with yet another tasty rice preparation, which goes well with many vegetarian and non vegetatian curries equally.


South Indian Coconut rice
Serves 6

Ingredients:
3 cups Basmati rice (uncooked)
1 ½ cup freshly grated coconut
Salt as required
Water - to boil rice.

For tempering:
1/3 cup – ½ cup coconut oil
2 tsp Urad Dal
1 tsp Channa Dal (Bengal Gram)
1 tsp Black mustard seeds
2 pinches asafoetida
2 twigs curry leaves
4 whole dried Kashmiri red chillies, halved
15 Cashew broken or a handful of peanuts

Preparation:

1.Wash rice several times. In a large saucepan bring water to boil. Add salt and rice and give it a good stir to avoid forming of lumps. Keeping the lid open, cook rice till done. (You can boil water in a kettle, to ease up the process). Take the pan off heat and drain water off in a strainer or colander.

2. Meanwhile, Heat another large saucepan, large enough to accommodate all rice (you can use the same pan used for cooking to reduce washing up!). Add oil and when hot, splutter mustard seeds followed by urad dal, channa dal and cashew nuts.

3. When both dals and nuts start to take golden colour, add chillies and curry leaves and stir for few seconds. Add in coconut and stir well to coat all the tempered oil and cook for 2-3 minutes. Add asafoetida and mix.

4. Tip in the drained rice and mix well until the tempered coconut is evenly distributed all over the rice. Serve hot with any non vegetarian or vegetarian curries.

N.B: Make sure not to burn the lentils because that will impart bitter flavour to the rice.

Tuesday, 9 March 2010

Spinach and Ricotta Cannelloni


Cannellonis were something that I had been looking forward to prepare and taste! And finally I did it. I don’t exactly remember how I came across this pasta, probably from food network channel or any TV shows or an internet recipe. Even though the recipe list may scare you, I bet these are not at all difficult to prepare. It is simple and the taste is guaranteed. Preparation takes a bit of time though but not so much as you really would think it would because everything gets cooked so fast apart from the baking time and there is minimal chopping up. Actually I prepared this probably an year ago and prepared again last week, was simply craving for some.

Cannellonis are tube shaped pasta shelled which are filled with any filling of your choice, may it be vegetarian or a pure meataholics delight of saucy minced meat. Here I chose a ricotta and spinach filling which is quite a common combination to go for the filling. I also used a low fat ricotta since I was using quite a lot of it. You can reduce the amount as much as you just wish to have. I just made it twice until now. The first time I made it I made it with mush lesser amount of spinach and ricotta. But the filling was quite less and we got more of lasagne sheets than the filling, but the taste was real good. So the second time I made it, I just increased the amount of cheese and spinach. You may reduce both if you don’t have enough of it or if you wish to have less amount of filling, like to have less spinach or want to use less ricotta, it wont alter the taste much.

Here I have used the lasagne pasta sheets instead of the cannelloni pasta. They are more economical and something that I always used. Unlike other pasta, these pasta comes in layers. The bottom layer consists of the filled shells, followed by tomato sauce on top and white sauce to go over that. I sprinkled with some cheese for that strong flavour. For preparation, I placed the filling on one end of the cooked pasta and rolled it into tube shape by keeping the filling in. I then arranged the rolled pasta into a large baking dish. If your pasta dish doesn’t accommodate in one dish, you can split them into 2 dishes. I then poured the tomato sauce and then poured the white sauce over. Sprinkled with cheese and viola! It’s ready to go.

I m not quite sure how it works with the tube shaped cannelloni though. I don’t know if it has to be pre-cooked before filling. But I have seen uncooked cannelloni sheets being filled with the stuffing and then cooked by pouring the sauce over. The tubes get soft and cooked with the juices from the sauces. Here as you see I have rolled the pasta to form a cannelloni. Instead of that you can make a spinach and ricotta lasagne just by layering the pasta, filling and sauces one after the other. It’s much easier and takes even lesser time. You can check out my lasagne recipe for reference.


Spinach and Ricotta Cannelloni
Serves 4 Adults
Preparation time: 40-50 minutes
Cooking time: 45– 50 minutes

Ingredients:
For the Filling:
Appx. 500g Chopped Spinach (I used the frozen chopped spinach.)
2 ½ cups ricotta (650g) (You may reduce the amount anywhere from 300g-600g)
150g sliced closed cup mushrooms (2 cups)
1 medium size onion sliced (100g,3/4 cup)
2-3 large flake of garlic,sliced
½ tsp dried basil
¼ of a nutmeg grated
½ tsp dried oregano
Salt – to taste
Crushed Black pepper – to taste
1-2 Tbsp Olive oil

Napolitana Sauce (Tomato sauce):
5 large tomatoes, chopped (500g)
2 large flakes of garlic sliced
1 tbsp olive oil
1 medium size onion, chopped (100g, ¾ cup)
½ tsp dried basil
½ tsp dried oregano
1 tsp sugar
¾ -1 cup water (Enough to make a thick sauce.)
1 tsp paprika/Kashmiri Chilli powder (Optional - Add only if you want it slightly hot.)
Salt – as required

Bechamel sauce (White sauce):
2 ½ cups- 3 cups (625mls-750mls)- semi skimmed milk or whole milk
1 Tbsp butter
1 Tbsp Olive oil/vegetable oil
2 tbsp plain flour
1 maggi vegetable/chicken bouillon cube (Stock cube)
1 tsp English mustard paste
Salt – as required
1/8 th of a nutmeg grated
Crushed white/black pepper (Optional).

Others:

14 – 16 Lasagne sheets
1/3 – ½ cup grated cheddar (optional)
2-4 Tbsp grated Parmesan

Preparation:


Tomato sauce:

Tomato sauce actually needs slow cooking, so the filling can be made while the sauce is cooking. For the sauce,

1.Heat oil in a saucepan and add chopped onion and garlic. Sauté till onion is really soft and translucent.

2. Add in the chopped tomatoes. Cover and cook on medium heat until the tomato has gone all soft and mushy.

3. Add in the herbs and paprika if using it. Add the required amount of water and cook on low for about 25-30 minutes.

4. Add the sugar and adjust salt.

5. Once the sauce is completely cooled, pour it in a food processor and whizz for few seconds until you get a chunky puree. You may do it in you blender as well; but make sure the sauce has cooled enough before you puree it. While the sauce is cooking, prepare the spinach and ricotta filling.

For the filling:
1. In a large frying pan, heat olive oil. Add in the sliced onions and sauté until soft. Add in the sliced garlic and sauté till soft.

2. Add in the sliced mushrooms and cook for about 4 minutes. Add in the chopped spinach, oregano, basil and crushed pepper. Cook for about 10 minutes until the spinach is all well cooked.

3. Grate in the nutmeg and stir well.

4. Turn the heat off and add the ricotta and stir well. Adjust the seasoning and add salt as necessary. Keep the filling aside.

After the filing and the sauce is ready, prepare the béchamel sauce:

1.Heat another saucepan on medium and add oil + butter.

2. Reduce the heat to low, add in flour. Stir continuously for a minute.

3. Take the pan off the heat and milk. Stir continuously using a wire whisk to break up any lumps.

4. Keep the pan back on heat, add the mustard paste and crumbled chicken stock cube. Keep stirring on low-medium heat until the mixture turns thick.

5. Grate in nutmeg and add crushed pepper if using. Stir well.

While the béchamel is cooking you can prepare the pasta.

Cook the lasagne sheets according to the packet instructions and drain the pasta on a clean kitchen towel.

To cook pasta, in a very large saucepan of boiling salted water, add a tablespoon of oil. Add 4-6 sheets of lasagne sheets and stir carefully and continuously, but not vigorously. This will prevent the sheets from sticking to each other. If you find it difficult to handle, you may add 2 sheets at a time and cook. Pick each sheet from the water using tongs and leave to drain on a kitchen towel.

Assembling:


1.Place a cooked lasagne sheet on a clean plate and add 2 heaped tablespoons of filling at the end of shorter side. Roll the pasta carefully keeping the filling in.

2. Place the rolled pasta on an oiled baking dish or a clear pyrex dish or gratin dish.

3. Roll all the pasta in the same manner until all the filling is used up.

4. Keep it in a single layer.

5. Pour the tomato sauce over and spread using a spatula.

6. Pour the white sauce over and lightly spread using spoon. Sprinkle the cheese on top and bake @ 180 degrees Celsius for about 45 – 50 minutes or you see golden brown patches all around.

Notes:
1. The pasta can be prepared 24 hours ahead, covered with cling film and refrigerated before baking. Then bake directly from the fridge until you see golden patches all around.

2. For the ease of preparation you may try shop bought nepolitana sauce and white sauce. I have never tried both anyways, since I find it easy to prepare the home made ones.


This is my entry for 'Healing foods-Spinach' hosted by divya of Dilse which was started by Siri of siri-corner.

Wednesday, 10 February 2010

Ghee Rice with Vegetables


Ghee rice with vegetables is something that I tried sometime back. It is the regular ghee rice that we make, but I tweaked in some veggies to make it slightly healthy. It goes well with the Mutton Buhari I posted earlier. In many families, especially children (and sometimes adults), are very reluctant when it comes to eating vegetables. The best ways to make them eat vegetables are adding some vegetables to their favourite dish. If for little ones, try chopping them fine. This rice can simply served with curd, pickle and pappad as well.


Ingredients:

3 cups Basmati rice
6 Cups water (Refer notes)
½ cup chopped onion (3/4 of a medium size onion)
1 cup diced carrot (1 medium size)
1 cup beans cut into small rings
½ Tbsp Cumin seeds (Jeerakam)
6 cardamoms
7 cloves
2-3 small pieces of cinnamon sticks
3-7 Tbsp Vegetable oil (See notes)
1 Heaped Tbsp Clarified butter/ Desi Ghee (See notes)
Salt – as required

Preparation:
1.Wash the rice in several times to remove the starch, place it in a colander to remove all the water.

2. In a large, heavy base non-stick saucepan heat vegetable oil and ghee. When hot, add sliced onion and sauté just until soft and translucent. (Don’t let the onions turn golden or brown since it will effect the colour and flavour of the rice).

3. Add in the cumin seeds, cardamom, cloves and cinnamon sticks and sauté for a brief time, just until the aroma comes out.

4. Add in the chopped vegetables (Make sure it is completely moisture free; else use the kitchen towel to remove the excess moisture) and sauté for five minutes until the vegetables are coated in flavour infused oil.

5. Add in the rice and stir fry for another 5 minutes.

6. Add boiling water and salt and mix well. Let it boil in HIGH HEAT until almost all the water is evaporated. Stir a couple of times in between.

7. When you see no more water at the bottom of the saucepan, Close the lid tightly and cook on VERY LOW heat for 10-15 minutes or till done.

Notes:
1. You may use all ghee instead of mixing oil and ghee. You may use as little as you may wish or increase the amount. Normally in ghee rice, quite lot of ghee is added to bring that delicious aroma. But when it comes to the healthy thoughts, I always substitute a major portion with vegetable or coconut oil. In this recipe I have used a heaped tablespoon of ghee and 3 table spoon of vegetable oil. I have used very much less than what is required.

2. In step 4, you can add vegetables along with rice and sauté for a good 8-10minutes on medium heat until all the rice and vegetables are coated with oil.

3. Another important thing to note is if you are planning to soak the rice, wash the rice well until you get clear water, and the starch is all washed out. Soak it for ½ - 1 hour. Use 1 ½ cup of water for 1 cup of rice if you are soaking the rice. So for this recipe you will need 4 ½ cups of water.

Thursday, 31 December 2009

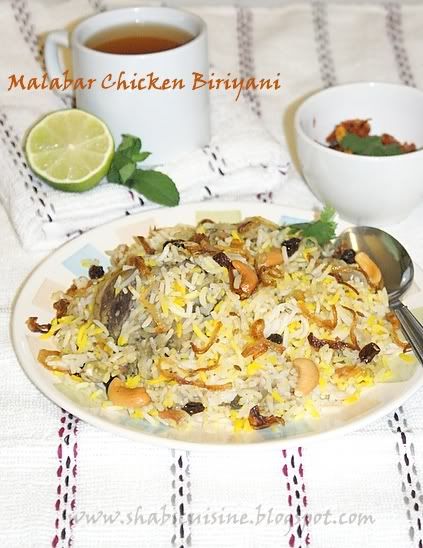
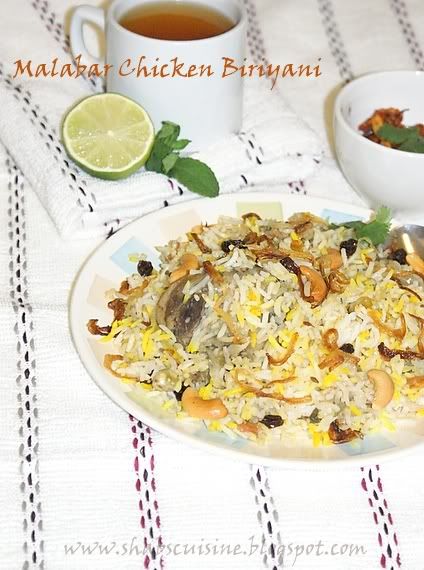
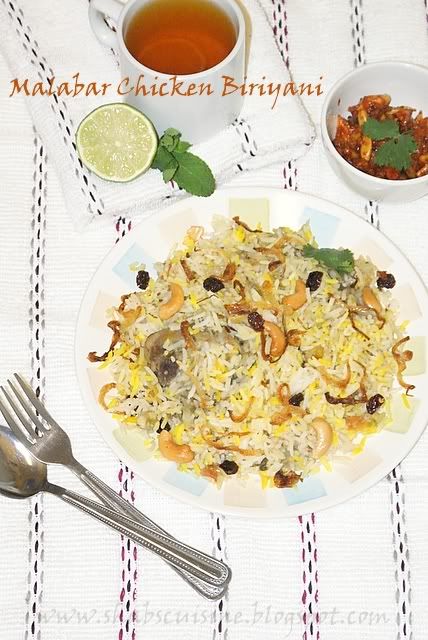
Malabar Chicken Biriyani


I thought I wouldn’t be able make another post before New Year, but here is another one. A yummy Chicken Biriyani. You can try it for the New Year if you really trust me! Once again, wishing you all a wonderful and prosperous New Year.

I have been getting lot of requests from my readers for Malabar Chicken Biriyani and here is the long waited recipe. Malabar Biriyani is known all over for its heavenly rich taste and its flavourful rice! Among them the most famous ones are the Thalassery Biriyani and Kozhikkodan (Calicut) Biriyani. Well, Even though Thalassery belongs to Kannur, the biriyani preparation is slightly different than Kannur Biriyani, but it can’t be beaten in taste and aroma, I bet. This time when I went to India I had Biriyani from different places of Kannur and they tasted almost similar and the method I noticed was also quite similar. The only difference would have been the addition of curd-some adds it and some doesn’t and the same with lime juice for masala. After all, they are used to bring in the sourness to the masala, and you can always increase the tomatoes instead. In my recipe, I always add lime and rarely use curd. The recipe I have given here is with the exception of curd. And For rice, some fries it and some don’t. If you notice, we don’t add pungent spices like chilli powder, Dhanya powder and turmeric powder. The main flavour comes from the ginger, garlic, chillies, tomatoes and onion. To add extra flavour, we finish it up with garam masala. The biriyani usually made is quite rich, lot of ghee is added and it is quite heavy. Here, I have used minimal amount of ghee as possible, so one can have it without much guilt. Well, you may add more ghee or oil if you wish. The recipe serves around 6 - 8 People with condiments side and it is just over a tablespoon of fat per person. How good is that!

For an authentic Malabar Biriyani, the rice that is normally used is known as ‘Jeerakashaala’ rice which has its own unique flavour and texture. The size of the rice is quite small, probably just half the length of the normal Basmati rice. Since we don’t get Jeerakashaala rice here, we always substitute it with Basmati rice. Well, I have never cooked with jeerakashaala rice. I was told by my mom that we don’t soak jeerakashaala rice since the biriyani gets mushy when soaked. So if using jeerakashaala rice for this recipe, please follow the ingredients as such, but do not soak the rice.


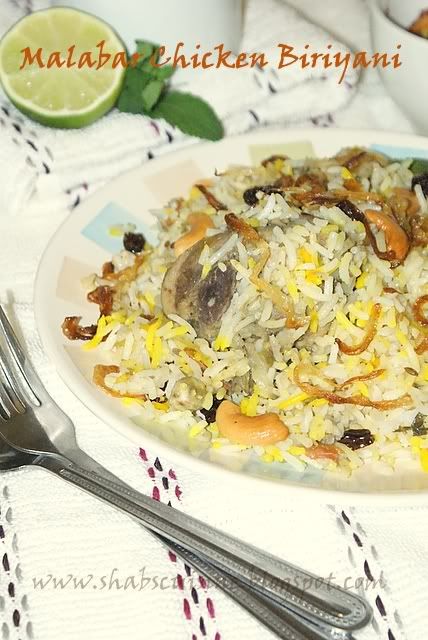
Malabar biriyanis are always garnished with fried onions, raisins and cashews. It is served along with Raita, a cucumber and yogurt based condiment, else tomato and onion in yogurt, a pickle, vinegary onions and pappadams. Chicken biriyani or mutton biriyani with the above said side dishes and chicken fries is the speciality of the Muslim weddings back in Malabar. It is always served after the starter ‘Alisa’, which is a porridge like stuff mainly made of wheat and meat and is served by sprinkling sugar on top! Yum..

Here is the recipe of Muslim style Malabar Chicken Biriyani.


Malabar Chicken Biriyani ( Serves 6-8)
For Ghee rice:

4 cups (800 g) Basmati rice
6 cups water
¾ cup onion sliced (1 medium size onion)
¾ - 1 Tbsp cumin seeds
7 cardamom pods
8 cloves
2 1” size pieces of cinnamon sticks
1 bay leaves
9 Tbsp clarified butter (Ghee), (I used 7 Tbs vegetable oil and 2 Tbs ghee)
1 Tbsp salt
1 Tbsp lime juice
1 twig curry leaves

For Biryani masala:
1 kg of large chicken pieces, preferably thighs, legs and breast
500g (4 ½ cups, 4-5 medium onions) thinly sliced onion
15 large cloves(4 packed Tbs) freshly minced garlic
65g (2 ½" thick piece) freshly minced ginger
330g (2 cups packed, 4 large) chopped tomatoes
20 (5 tsp) minced Green chillies (reduce if you want it less hot), you may use just 12-15 of them
½ cup Chopped Coriander leaves
10-12 fresh mint leaves chopped
22 mls (1 ½ Tbsp) freshly squeezed lime juice
½ tsp garam masala + 1 tsp extra to sprinkle on rice while layering.
4 tsp Oil (you may add more if needed)
3 cardamoms
8 cloves
4 small pieces of cinnamon sticks (1” size, thin ones)
1 ½tsp - 1 ¾ tsp Salt

For garnishing:
2 handful cashews
2 handful raisins
2 medium onions sliced thin
Few drops of yellow or orange food colouring or both (opional)

Step by step guide to prepare Dum Biryani:

Method to prepare Biryani masala:
1. Wash chicken well, place it on a colander to drain off all water.
2. Heat a large vessel to medium low and add oil. When hot, throw in the whole spices. When they leave the aroma (takes upto a minute on low heat) sauté chopped ginger, garlic, chillies and onions along with salt until the onions become soft and translucent.
3. At this point, add chopped tomatoes. When the tomatoes start to soften ad breakdown almost completely, add chicken and cook until almost done. All this should be done on a low heat so that onion releases its juice and chicken gets cooked in that juice slowly.
6. Add lime juice, chopped coriander and mint leaves and cook the chicken until done. Add garam masala and close lid to infuse in the flavour.

Note:
If there is lot of liquid, boil it off and reduce to a thick masala. If there is lot of water, the rice may end up overcooked.

Method to prepare Ghee rice and Garnishing:
1. Wash rice several times until you g et clear water to drain. Soak the rice for half an hour.

2. For preparing the garnish, in a large non-stick vessel, add oil + ghee or only ghee as mentioned in the recipe and fry the cashews until golden. Remove them and drain on a kitchen towel. In the same oil fry the raisins until they puff up and keep them along with cashews. Fry the onion until just golden and keep them with the former. The onion will get coloured (will continue to cook even after you take them out, so don’t fry until brown).

3. For preparing the ghee rice, In the same vessel, add ¾ cup slice onion and sauté till the onion turn soft and translucent. (don’t brown them, that will effect the colour of the rice.). At this stage add cardamom, cloves, bay leaves, cinnamon and cumin seeds and sauté for a minute until it leaves the aroma.

4. Strain the rice and tip in the rice slowly and fry for 5 minutes on high heat by constant stirring.

5. Add boiling water, salt, curry leaves and lime juice and keep boiling, by keeping the lid open until all the water has disappeared, but the rice is still wet and not dry.

6. Reduce the flame to low, Cover tightly to let all the steam in and cook it until done. In between you can flip the rice two times to ensure even cooking.

If you follow the method of preparing therice you should get well fluffed individual rice that doesn’t stick to each other.

For layering the biryani and final cooking:

1. Using a large plate, take out 2/3 rd of the rice from the vessel and transfer it to another bowl. Leave the rest 1/3 of the rice in the vessel and level off the surface neatly using a spatula. Sprinkle a good pinch of garam masala (from the garam masala that is reserved for sprinkling) all over. If you are adding colour, add few drops of yellow or orange food colouring in 4-5 places.

2. Take half of the masala and sprinkle over the rice along with the chicken.

3. Spoon 1/3 rd of the rice again over the chicken masala. Sprinkle a good pinch of garam masala, and few drops of colouring.

4. Add the rest half of the masala and complete the layering by spooning the last 1/3 of the rice. Sprinkle again with garam masala, and few drops of colouring.

So now you have alternating layers of rice and masala that’s goes like this: Rice, Biryani masala, rice, Biryani masala and again rice.

5. Cover the entire vessel with foil (to ensure that full steam stays in), then close the lid tightly. Place a weight (you can also use any vessel filled with water for this) over this vessels and cook on hob top for about 30 minutes at very low heat. This is to infuse the flavour of the biryani masala into the rice and this process of cooking is called ‘Dum’. To know if it is done, lift the lid and you should be able to see steam coming from the top part of rice. (Don’t expect smoke, it will be just a light streak of steam from here and there) and the rice on the top will be slightly curvy!!

6. You can also do the layering in an ovenproof vessel and place it in a preheated oven at a very low temperature for about 20-30 minutes for the final cooking. I never tried this, but my friends do it this way.

Just before serving, garnish with fried onions, cashews and raisins.


Note:

1.You can also sprinkle little of the fried onions while layering and leave the rest for garnishing. You may sprinkle it along with garam masala. This helps to bring out the flavour of fried onions into the rice. And it is real good too.

Tuesday, 13 October 2009

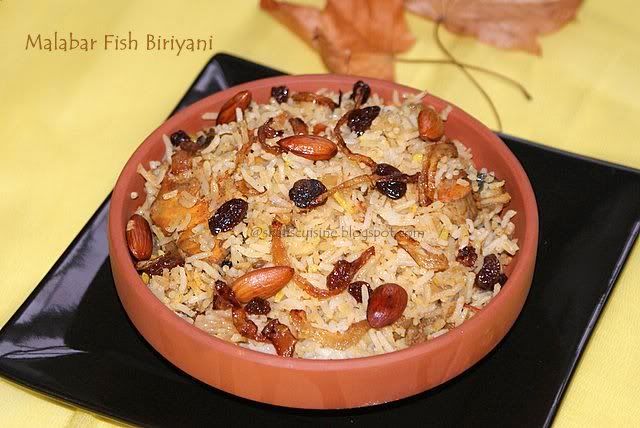
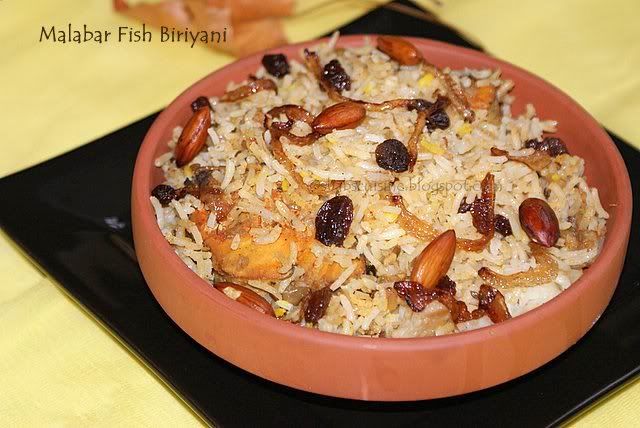
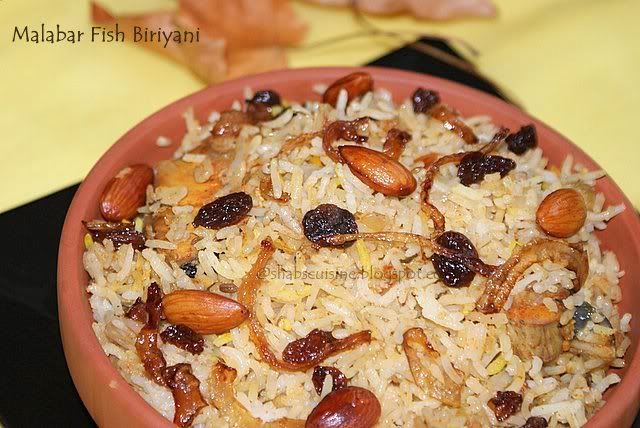
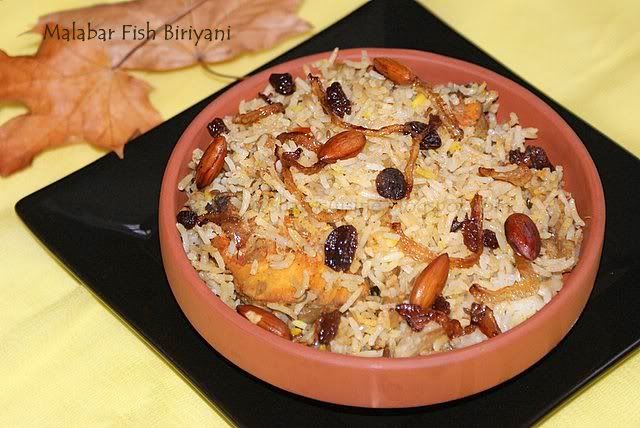
Malabar Meen Biriyani - Malabar Style Fish Biriyani (Fish and Rice Casserole)

Hi pals,
I am flying to India this Friday for a short holiday of three weeks. I am quite excited about it because I really wanted a change and this would be a perfect one...But I just wish if my family were there too...Then it would have been the best holiday ever!!..This time my B’Day will be in India too. I don’t remember being in India on my B’Day. So looking forward to it... Before leaving, I will share with you all one of my favourite recipes i.e. Malabar Fish biriyani. As I have told before I am a lover of prawn and fish biriyani and prepare them whenever I get a chance to. This is prepared in Malabar style with lots of sautéed onions, ginger, garlic and tomatoes with a touch of spice and spicy fried fish. The outcome is a slight tangy fish masala that pairs well with the ghee rice making a wonderfully aromatic and rich Fish Biriyani. The recipe is very similar to the Chemmeen Biriyani I posted before and tastes yum!


These days I am finding it quite difficult to blog, since my little one wants me full time with him. So I am fully engaged and no time to spare at all. We play a lot and do colouring, reading his animal books and rolling his tiny cars with him...Um, I am no so keen on doing colouring and playing with cars and all but I am forced to!!!......Today I just grabbed the ‘Henna’ or ‘Mehendi’ cone that was lying in the fridge since Eid and started applying it on his tiny hand...(Well, I dirtied up his hand)....he was quite patient with it and was curious and happy too....because I was drawing his favourite items like: ball, moon, ‘caach’(cars), ‘Faathaafy’ (Butter-fly), ‘shun’ (sun) and ‘tarsh’ (stars).. Now I think he also dreams about dogs and cats because in sleep he sometimes says dog, cat etc....Well, he just started talking since one month and these are few of his vocabularies and the way he pronounce them. Then I applied henna on one of his little feet also. I applied it quite well, but dint have much luck with it....he rubbed his foot on the carpet and messed it up.....


Ingredients:
For Fish masala:
600 gm (4 Large pieces) King fish.

To marinate the Fish:
1 Tbsp Kashmiri Chilly powder
2 tsp Coriander powder
1/2 tsp turmeric powder
½ tsp lime juice
½ - ¾ tsp salt (Check and adjust)
10 tbs vegetable oil for frying fish and making masala.

For the gravy:
3 medium-large onions crushed in processor(3 cups, 500 gm)
2 1/2 medium size tomatoes chopped (1 1/3 cup, 300 gm)
12 cloves of garlic, crushed (3 tbs)
5 green Chillies, chopped fine (adjust to your taste)
4" piece ginger, crushed (60gm, 4 tbs)
1 tsp pepper powder
1 tbs lime juice
1/2 cup chopped coriander leaves (loosely packed)
6-8 mint leaves,chopped
2-4 Tbsp water (I added 4)
½ tsp fennel seed powder
1 tsp salt, or as reqd
1 tsp garam masala.

For the Ghee rice:
3 cups Basmati rice
4 1/2 cups boiling water
salt-as required - (I used 3/4 Tbs salt)
3 tbs Clarified butter/ghee
4 tbs vegetable oil
1 large onion sliced
2 Tbs raisins,washed
1 bay leaf
5 cardamom
7 cloves
4 small pieces of cinnamon sticks
1/2 Tbs cumin seeds
3/4 tsp extra garam masala to sprinkle while layering rice

For Garnishing:
4 Tbs Almonds blanced,peeled and roasted (I din’t get time to blanch and peel, that’s y u see the skin on) or cashew nuts
1 large onion sliced
2-3 Tbsp raisins
½ tsp turmeric powder + little water/ few strands of saffron soaked in water/little yellow or orange food colour.


Preparation:
First prepare the Fish masala:
1. Wash the fish, drain and marinate them in kashmiri Chilli powder, Coriander powder turmeric powder, lemon and salt for half an hour.

2. Heat a large non-stick saucepan to high, and add the oil. When hot, shallow fry the fish briefly on both sides, turning once or twice. Drain them in the kitchen towel.

3. In the same oil add the chopped onion, ginger, garlic and chillies along with salt and cook until the onions have become soft for about 10 - 15 minutes.

4. Add in the chopped tomatoes and pepper powder. Reduce the heat to medium and cover and cook until the tomatoes become soft and you get a thick gravy.

5. At this point of time, add the chopped mint leaves, chopped coriander leaves, garam masala, fennel powder and lime juice. Reduce the flame to low, stir well, cover and cook for another 4 -5 minutes.Add 2-4 Tbs of water and stir well.

6. You can break the fish into 2–3 pieces if they are really big (I did, since it is easy to manage). Add in the half fried fish and cook on very low flame for about 15-20 minutes so that the flavour of the fish diffuse in the gravy and the gravy is thick.

For preparing the Ghee Rice and the garnish:
1.Wash rice several times and soak the rice in normal tap water while you prepare the fish masala, for about ½ -1 hour.

2. Boil water in the kettle or a large cooking vessel.

3. Heat a large pan to high heat and add ghee and oil. Sauté the onions to be garnished until golden and take them out. In the same oil, sauté the cashews or peeled almonds until golden and keep them along with onions. In the same manner sauté raisins until it puffs up. Keep them with the fried onions and nuts.

4. For preparing the ghee rice, In the same oil, add onions and sauté until the onions turns soft. At this stage add cardamom, cloves, bay leaves, cinnamon, raisins and cumin seeds and sauté for a couple of minutes until the aroma of the spices starts coming out.

5. Reduce the heat to medium and add drained rice. Sauté for about 3-4 mnutes until the rice is well coated with the oil and the spices. Add the boiling water and salt to this. When the water starts bubbling, reduce the heat to low, cover the saucepan with a very tight lid to prevent the steam from escaping. If you don’t have a tight lid, first cover the saucepan with few sheets of newspaper/foil and then cover tightly with a lid. It will hold all the steam in. Cook for about 20 minutes or until done. Cooking time may differ depending on the rice you use. In between you may toss the bottom part of rice and bring to top once or twice, so that the rice gets cooked evenly. Then do the layering.

For layering the biryani and final cooking:
1. Divide the rice in 3 parts and masala in two parts.

2. Take a large heavy based vessel and rub it with oil or ghee. Layer the bottom of the vessel with the first part of the rice. Sprinkle a 1/4 tsp of garam masala all over and scatter one half of fish masala over the rice. Tip in the second part of rice and sprinkle a good pinch of garam masala (1/4 tsp) all over again. Scatter the second half of fish masala over the rice and then tip in the third part of rice and sprinkle a good pinch of garam masala (1/4 tsp) all over again. Now you can sprinkle yellow or orange food colouring in streaks if you like to have few yellow grains. I used ½ tsp of turmeric powder mixed in little water. You may use saffron soaked in water as well.

3. Cover the entire vessel with foil (to ensure that full steam stays in), then close the lid tightly. Place a weight (you can also use any vessel filled with water for this) over this vessels and cook on hob top for about 20-30 minutes at very low heat. This is to infuse the flavour of the biryani masala into the rice and this process of cooking is called ‘Dum’.

4. You can also do the layering in an ovenproof vessel and place it in a preheated oven at a very low temperature for about 20-30 minutes for the final cooking. I never tried this, but my friends do it this way.Just before serving, garnish with fried onions, cashews and raisins. Enjoy with Cucumber Raita, tomato and onion salad, thenga chammanthi, pickle and pappadams!


The sequence I followed:
1. I washed the rice and soaked it.
2. Started the masala preparation by peeling the onions, ginger and garlic. Chopped them all in processor to make the work easier. And prepared the masala. Kept them aside.
3. Prepared the garnish
4. Prepared the rice.
5. Did the layering.
6. Garnished while serving.

Check out other rice recipes here:

Chemmeen Biriyani
Aromatic Rice Pulao
Chilli Garlic Fried Rice
Fried Rice
Thalassery Mutton Dum Biryani
Ghee Rice (Neychor)

Awards and Meme:
My friend Saju has shared an award with me. Thanks you for sharing this award and the meme. I really enjoyed doing the meme.


This award goes with a fun meme which has to be passed on to 6 of your favourite blogs and which has to be answered with only one word (Oops, I saw this rule after writing the meme....Damn..I don’t have time to re-write..Sorry....).

Here is the meme part:

1. Where is your cell phone: Next to me..
2. Your hair: Black
3. Your mother: Caring.
4. Your father: kind.
5. Your favorite food: biriyani
6. Your dream last night: none
7. Your favorite drink: Hot-chocolate.
8. Your dream/goal: Secret ;)
9. What room are you in: Living room
10. Your hobby: Blogging.
11. Your fear: Darkness, reptiles, dogs, heavy lighting and thunder, sometimes strangers etc...the list goes on..
12. Where do you want to be in 6 years: UAE .
13. Where were you last night: Home.
14. Something you aren’t: Hypocrite.
15. Muffins: chocolate chip Muffins.
16. Wish list item: Coco perfume By Chanel, but my husband hates the smell of it!!
17. Where did you grow up: Kerala/ UAE
18. Last thing you did: Had a glass of juice.
19. What are you wearing: A long Skirt and a T-shirt.
20. Your TV: Plasma.
21. Your pets: Would prefer if someone takes care of me...:)..No pets.
22. Your friends: Hubby, Mom, sisters, school and college friends.
23. Your life: Going with the wind.
24. Your mood: Happy.
25. Missing someone: My family in UAE.
26. Vehicle: It’s a car.
27. Something you’re not wearing: Jewellery.
28. Your favorite store: Marks and Spencer, Tesco.
29. Your favorite color: Keeps changing
30. When was the last time you laughed: Sometime today....don’t remember
31. Last time you cried: Yesterday....My son really hurt his hand (pulled his elbow) and I couldn’t bear it.
32. Your best friend: My Mom.
33. One place that I go over and over: Kitchen....
34. One person who emails me regularly: There are many actually...
35. Favorite place to eat: Home sweet home.


Also vidhas has passed a ‘Giant Bear Hug’ Award. Thank you so much Vidhas.


I would like to share these awards and meme to the following great bloggers:

Sushma Mallya
Pavithra
Faiza Ali
Vrinda
Priya
Sangeetha Subhash

Sunday, 20 September 2009

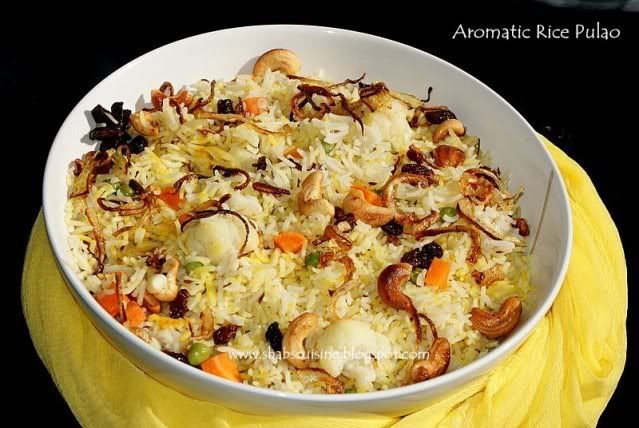
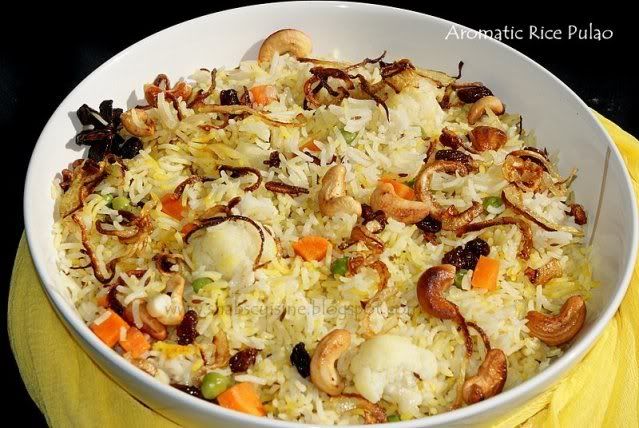
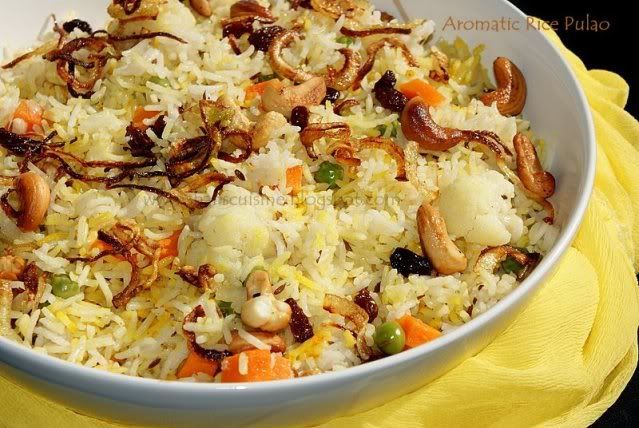
Aromatic Rice Pulao - My 100th Post!

A warm Eid wishes to all of my dear readers out there. This time it’s one of my special posts, it being my 100th post! I have been waiting for sometime to hit the ‘Century’ and finally I did! Hurray!! I thought I would make this special post during Eid itself. If anyone out there doesn’t know what Eid is, it is a day of celebration for Muslims that comes after a whole month of fasting. It is something like X’mas for Christians. We celebrate Eid by making special dishes and visiting the families and friends. If in Malabar region, right after the Eid Prayer, there would be a light snack and tea. Then the real spread is the lunch which would consist of mainly Alisa for starter, Mutton biriyani with chicken fries, salads and Raita for main dish and something for dessert - it can be anything from a single custard and fruits etc to the very elaborate Godambu payasam, sometimes known as Musaara varakiyathu or Chakkara Chhoru and kaaykkari. This is a time that I would be missing being with my family because my mom makes the best of the above mentioned payasams and biriyani. How much I would be missing those...Sigh! Whenever I go to visit her, this is the only payasam that I ask her to make it for me. Well, I haven’t tried making it by myself after all. My fave being the Musaara varakiyathu/Chakkara Chhoru is made of ground wheat and coconut milk and cooked Channa dal sweetened with sugar or Jaggery. Kaaykkari is another wheat payasam made of whole wheat with coconut milk and chopped plantains are added to it for an extra bite. My god, I am already salivating. These are traditional payasam made in Malabar Muslim houses during festive occasions.

This time I am going to post a recipe for very flavourful rice as the name indicates. The recipe is adapted from the ‘Gulf News’ cookbook that my uncle brought for me long ago, as old as 12 years. The book has so many mouth watering dishes with stunning pictures in it. This particular rice has caught my attention ever since I saw it in that book. Especially during Ramadan when we don’t eat anything during the day, any food or food picture no matter if it is appealing to the eyes or not, we will crave for them. And this is such a dish that I had craving for and made it. As the name sounds, it was really aromatic, perfectly cooked and tasted really fantastic. This is not the only Pulao that I make, but this is the easier one with less chopping of vegetables involved and lesser spices and masala. Unlike the biriyani, this tasted great on the first day rather than next day. Hope you will enjoy as much as we did.
The book also mentiones that the key to making superb rice pulao is to gather all the many ingredients together first. Therefore making it is very straight forward and always deliciously worthwhile. Enjoy your Eid!

Recipe Courtesy: Gulf News Cookbook
Aromatic Rice Pulao/Pilaff/Pulav (Serves 4-6)
Ingredients:
2 ½ cups/500 g Basmati rice
3 ¾ cups chicken stock (I used 1 ½ magi chicken stock cubes and just a bit of salt)
4 Tbs vegetable oil
2 Tbs clarified butter/ghee
½ cup chopped onion (1/2 of a large onion)
1 cm / ½ inch ginger
Salt to taste
Spices:
1 bay leaf
2 star anise
5 cardamoms
4 small pieces of cinnamon sticks
7 cloves
1 – 1½ tsp cumin seeds
Few drops of yellow food colouring (I used ½ tsp turmeric powder in little water and sprinkled on top)
Vegetables:
100g /1 large/ Carrot cut into small cubes (1/2 cupful)
100 g/ 4 large florets Cauliflower, cut into medium size pieces
70g / ½ cup frozen green peas
For Garnish:
½ cup-1 cup sliced onion
¼ cup / 30g Dry nuts (Cashew, pistachio, almonds etc or a mix of all)
2 Tbs / 25g raisins

Preparation:
1. Wash the rice several times and soak for an hour to lengthen the grains during cooking.
2. Heat a large saucepan, add oil+ghee, fry the onions for garnishing until golden, drain and keep them aside. In the same oil, add cashew and fry until golden. Take them out too. Again, in the same oil add raisins and sauté just until it puffs up. Keep it along with nuts and onion.
3. In the same oil add all the spices and sauté just for few seconds if on high flame. Take care not to burn the spices, else the whole rice will go bitter. Add onion and ginger and sauté until the onion is soft.
4. Add the reserved rice and sauté for 2 minutes to cover the rice with the flavours of the pan.
5. Add the vegetables and sauté for further 2 minutes.
6. Mix the stock cubes in boiling water and add it to the pan. Stir for a couple of minutes and adjust salt if needed. Since the cube is quite salty, adding just a little salt would be enough.
7. When the water starts boiling, cover and cook on low flame for about 20 minutes or until the rice is well cooked. Stir once in between to allow uniform cooking.

Note: You can use ghee completely instead of using oil, or u can just oil. Use the vegetables you have in hand like mushrooms, corns, beans etc...These are the only ones I had in hand! You can also use more nuts and dry fruits in the rice. I would definitely be adding more raisins because I like the little sweet taste in between the deliciously flavoured rice. The recipe also asks for adding 1 tsp saffron mixed in milk for colour and 2 tsp of rose water/kewra water. I dint add both, since I dint have saffron and I am not sure if I would like the taste of rose water in my Rice. But as the recipe indicates, it was really aromatic and yummy!

Tuesday, 21 July 2009

Malabar Chemmeen Biriyani (Malabar Prawn Biriyani)

Do you know what's the best thing in preparing a Malabar Biriyani?The taste always gets better the next day and you can prepare it in bulk so you can take a break from any major cooking the next day..:)...I made this Biriyani last week and again this week, so thought I would share this fabulous recipe here with you all. The aroma of the seafood Biryani itself is very appetising, unlike the raw fish smell, that makes you run away. My favorite Biriyani would be Malabar style prawn and fish biriyani. Both are prepared almost the same way. But tastes very different. I remember my mom telling me about squid biriyani. Somebody told her that squid biriyani is the best tasting biriyani it seems. I would love to try that, but I think that's going to be very challenging. Since squid gets tough and rubbery when over-cooked, it has to be cooked gently and carefully, and don't know how they are gonna taste.
I love the prawn and fish biriyani that my mom makes, they really tastes so delicious. I always tell my dad how lucky he is to get mom as wife. He gets tasty food everyday; even the simplest of the meals tasted so yummy when it is prepared by her. When it comes to saving her recipes, it was always difficult for me to note down her recipes exactly since she uses approximate('Sumaar' as she says:)) measurements. Whenever she cooks, I will grab a pen and paper, stand by her side and start noting down the ingredients that she uses, gradually she keeps adding things in between and I won't be able to measure them out. Other day she was making my favourite Muslim paayasam called 'musara varakiyathu' or 'kaaykkari', that's made of mainly channa dal, Wheat,coconut milk and sugar. I desperately wanted that recipe, so soon I grabbed a paper and pen and stood by her side to note down the amount of ingredients she was using. Noted the amount of dal and wheat and somehow managed to get the amount of coconut milk approximately. When it came to adding sugar, she tipped the sugar directly from the large sugar tin that we had, and I am standing there with my jaw opened telling her I couldn't note down the amount of sugar....That's what happened many a time when I went to note down the recipe. So after coming back to UK, I keep trying her incomplete recipes by adding and subtracting things to get the right taste. This is my dad's favorite biriyani, and making my dad's favorite dishes always make me miss him so much that I can't express. My dad and husband loves to explore new dishes and new taste. But my mom is just opposite. She is very reluctant when it comes to new food and new taste. So we always had trouble when we go to the restaurants with her, she would hardly eat anything. She would be very happy if she is served with a bowl of steaming hot rice and a good spicy sardine curry.....Nalla choodu chorum mathi curry yum...


For making this Biriyani, you can also use shrimps or prawns of any kind. It tastes the best when served with the coconut chammanthi (at least), that I have already put in the blog.

Ingredients:
For prawn masala:
500 gm (40-42 pieces) Peeled Jumbo King Prawns.
To marinate the prawns:
2 tsp Kashmiri Chilly powder
1 tsp Coriander powder
1/2 tsp turmeric powder
3/4 tsp salt
8 tbs vegetable oil for frying prawns.
For the gravy:
2 large onions chopped(2 3/4 cups, 380 gm)
2 1/2 medium size tomatoes chopped (1 1/4 cup, 290 gm)
12 cloves of garlic, grated (3 tbs)
5 green Chillies, chopped fine
3" piece ginger, grated (60gm, 2 tbs)
1 tsp pepper powder
1 tbs lime juice
1/4 cup chopped coriander leaves
10 mint leaves,chopped
1 tsp salt, or as reqd
1 tsp garam masala.
For the Ghee rice:
3 cups Basmati rice
6 cups boiling water
salt-as required - (I used 3/4 Tbs salt)
3 tbs Clarified butter/ghee
4 tbs vegetable oil
1 large onion sliced
1 bay leaf
5 cardamom
7 cloves
4 small pieces of cinnamon sticks
1/2 Tbs cumin seeds
1/2 tbs lime/lemon juice
1/2 tsp extra garam masala to sprinkle while layering rice

Preparation:


First prepare the prawn masala:

1. Wash the prawns, drain and marinate them in kashmiri Chilli powder, Coriander powder turmeric powder and salt for half an hour.
2. Heat a large non-stick saucepan, and add the oil. When hot, shallow fry the prawns briefly, stirring then frequently for 3-4 minutes and fish them out.
3. In the same oil add the chopped onion,ginger,garlic and chillies along with salt and cook until the onions have become soft for about 15 minutes.
4. Add in the chopped tomatoes and pepper powder. Cover and cook until the tomatoes becomes soft and you get a thick gravy.
5. Add in the half fried prawns and cook on low flame for about 20 minutes so that the flavour of the prawn diffuse in the gravy and the gravy is thick.
6. At this point of time, add the chopped mint leaves, chopped coriander leaves, garam masala and lime juice. Cover and cook for another 5 minutes. remove from the fire and keep them aside.

For preparing the Ghee Rice:
1.Wash rice and strain off all the excess water by placing the rice in colander.
2. Boil water in the kettle or a large cooking vessel.
3. Heat another large pan to high heat and add ghee and oil. When the ghee gets hot add onions and sauté until the onions turns soft. At this stage add cardamom, cloves, bay leaves, cinnamon and cumin seeds and sauté for a couple of minutes until the aroma of the spices starts coming out. Add boiling water, lemon juice and salt to this.
4. When the water starts bubbling, tip in the rice slowly and cook on high heat by keeping the lid open. At this stage, you will be able to see water an inch or two above the rice.
5. As soon as you see that water has gone below the rice, reduce the flame to low, and cook it covered until all the rice is cooked evenly. In between you may toss the bottom part of rice and bring to top once, so that the rice gets cooked evenly. Let it cool down a bit. Then do the layering.

Apart from the above method, You can also cook rice in different way. That's quite similar to the above, but a small difference....i.e.Follow the first three steps as above. Then add rice to boiling water. When bubbles start appearing on the surface again, reduce the heat to medium, cover the saucepan tightly and let it cook till done. it takes around 20 minutes, but it will depend on the rice. First time I made by the first way and second time, this second way. I think I will follow the second way from now on...that's much easier.

For layering the biryani and final cooking:
1. Divide the rice in 2 parts.
2. Take a large heavy based vessel and rub it with oil or ghee. Layer the bottom of the vessel with the first part of the rice. Sprinkle a 1/4 tsp of garam masala all over and pour prawn masala all over the rice. Tip in the second part of rice and sprinkle a good pinch of garam masala (1/4 tsp) all over again.
3. Cover the entire vessel with foil (to ensure that full steam stays in), then close the lid tightly. Place a weight (you can also use any vessel filled with water for this) over this vessels and cook on hob top for about 20-30 minutes at very low heat. This is to infuse the flavour of the biryani masala into the rice and this process of cooking is called ‘Dum’. At this point of time u can see that all rice on top has curved up.
4. You can also do the layering in an ovenproof vessel and place it in a preheated oven at a very low temperature for about 20-30 minutes for the final cooking. I never tried this, but my friends do it this way.Just before serving, garnish with fried onions, cashews and raisins. Enjoy with Cucumber Raita, tomato and onion salad, thenga chammanthi, pickle and pappadams!
Related Posts Plugin for WordPress, Blogger...