Showing posts with label North Indian. Show all posts

Tuesday, 16 October 2012

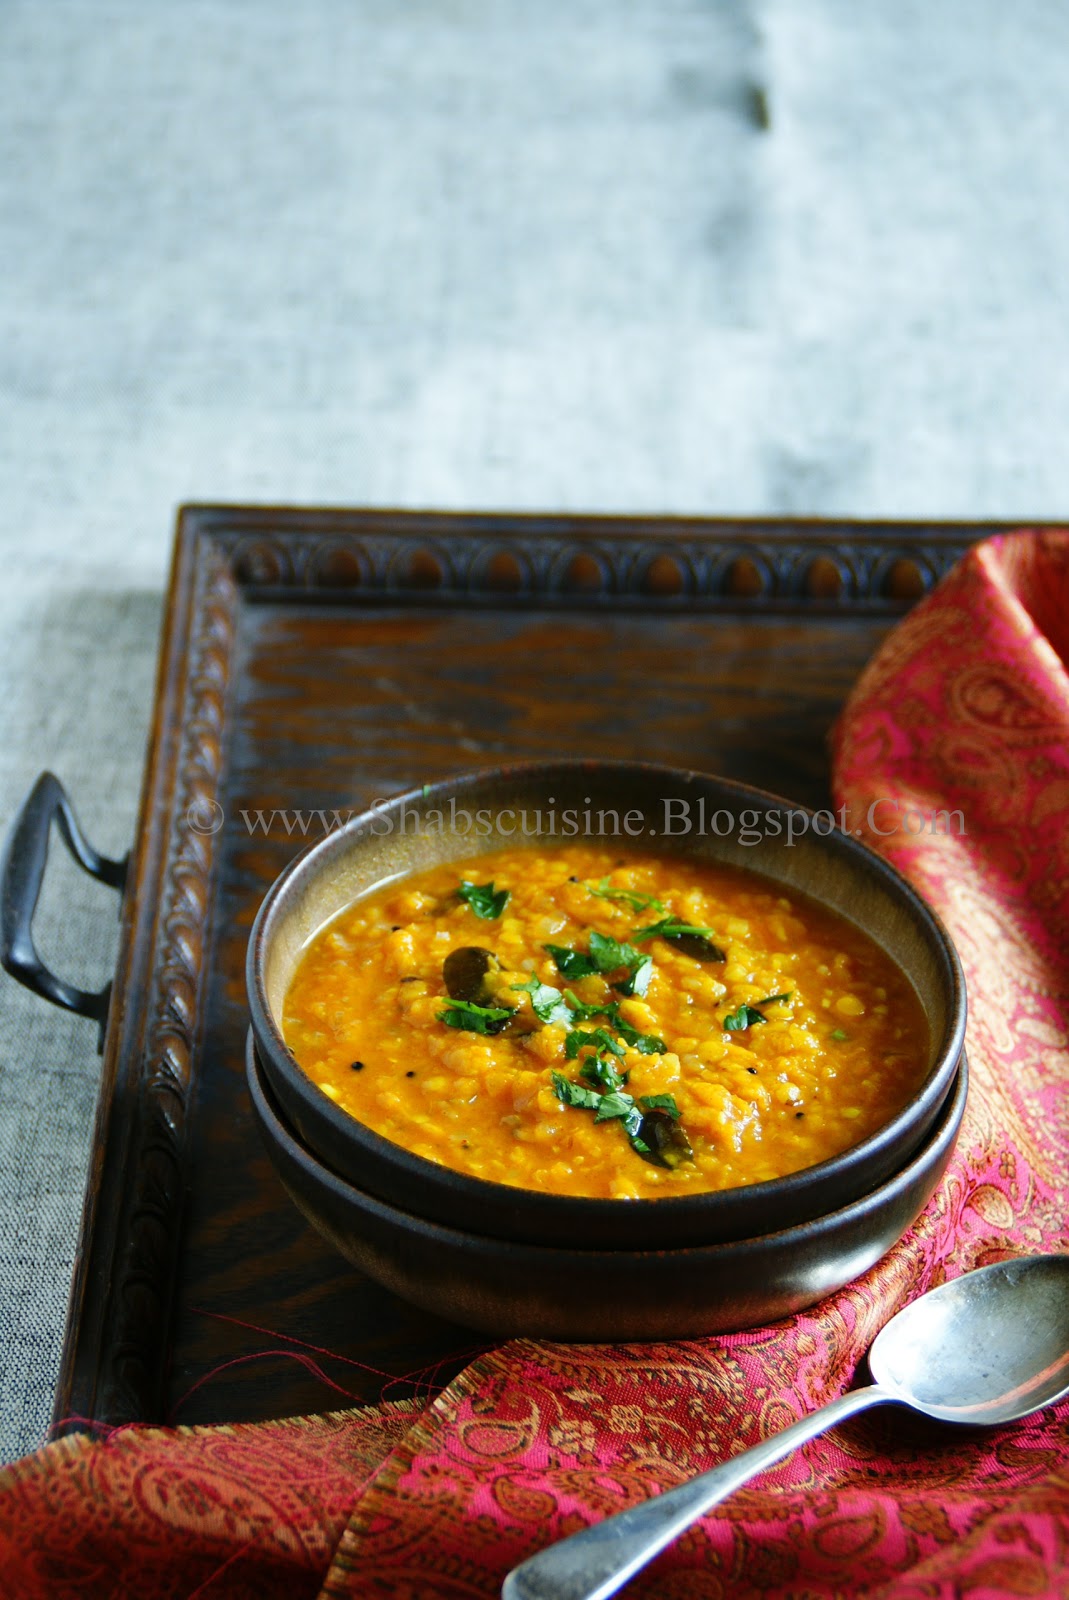
Tadka Dal


Sometimes it is the simplest of recipes that takes time to perfect, to master. For me, it has always been so. Partly, it might  be due to me taking the simple recipes for granted. And partly I may be careless dealing with easy recipes and don’t pay enough attention. Or am I over-confident? I don’t know, but I almost always screw up simple recipes. I handle complicated recipes at ease as I pay too much of attention, care and take good amount of time preparing it. But when it comes to easy recipes I have always been a sucker!! I rush into making it, carelessly throwing in ingredients and then ruining the entire dish or rather unappealing. Dal was a constant victim of such careless preparation. So this time, I planned to do everything slow, taking time and care and adding my love while preparing it. That was it. It was just the way I want.  When you cook something, you have to cook with love for it to be tasty. That is not just saying, that is the truth. One should love what you are cooking, for the outcome to be good.


One of my friends who hail from Pakistan called fouziya prepares very good dal curries. She prepares them at a fast pace, randomly throwing in stuffs, but her recipes always turned out very tasty. She had given me her recipes; I tried them quite a few times long ago but I never got it right. Now that I have been cooking for a while and learned to cook by instincts rather than sticking to a recipe, I should be able to get those recipes right now. I should try them again. 


Dal has always been my easy way out when I am in no mood to cook. It is simple, healthy and requires less effort and time. I prepare them quite often to include great protein in our diet especially when we cut down on our meat intake. This is one of the easiest of dal curries that I prepare for rice and roti. I usually add potatoes, but this time I opted it out as the husband has been repeatedly asking me to prepare dal without potatoes. This is the kind of dal my mother makes. She makes it quite watery for having it with rice, but I like it slightly thicker, so I use more lentils, less water.  This could go even thicker if you reduce the water content. You could also reduce the water and add little coconut milk once the lentils are cooked for a different taste.

I usually slow cook dal over low heat for a good amount of time as pressure cooking gives a different texture to the gravy.  When you pressure cook the lentils, you can see that it gets thicker as it sits. Hence, we would have to loosen the curry later on by adding water which I feel spoils the taste of the curry.  But with lentils being slow cooked in a saucepan retains its texture and flavour throughout and doesn’t set or become thick later on. You also get creamier dal when you slow cook dal and you can control the amount of water that goes it giving it the right consistency. 


Tadka dal is a popular Indian dal curry, which in simple words means tempered dal curry. I guess some call this dal fry as well. Any variety of dal could be used for preparing the curry and then temper it using any blend of spice. I usually prepare it using masoor dal, toor dal and moong dal (Green gram dal). You can also mix 2-3 lentils, but water should be adjusted accordingly. Spices are tempered in ghee or oil to release their flavour and this tempered oil is added to the curry imparting their flavour and aroma to the curry. The spices used differ from place to place and people and accordingly there would be slight variation. Nevertheless, this effortless dish is comforting and is a staple food in India.

This post also goes for the event My legume love affair originally started by Susan of The wellseasoned cook, being hosted by Sra of whenmysoupcamealive.


Tadka Dal
Serves 4
Preparation time: 10 minutes
Cooking time: 30-40 minutes

Ingredients:
1 cup split red lentils
1 ½ large tomato chopped, 150 g
1 large onion chopped, 200g
3 large cloves of garlic, chopped
2 ½ - 3/12 cups water
1 large potato (optional)
1 teaspoons mild chilli powder or paprika
½ tsp turmeric powder
1-3 green chillies or omit it if you want it very mild
salt – as required
1 tsp oil

To temper (Tadka):
1-2 tbsp coconut oil/vegetable oil or ghee
½ tsp black mustard seeds
2 twigs curry leaves
¼ tsp cumin seeds
1-2 broken red chillies

To garnish:
Chopped coriander leaves.

Preparations:
1. Wash lentils in several changes of water and soak for ½ an hour. Drain the water. Wash and cut the potato into 4 or 6 pieces, if using.

2. Place the lentils with all other ingredients except the tadka in a medium saucepan and bring to boil. Reduce the heat, cover and simmer until the dal is cooked and the gravy is thick. (First add 2 ½ cup of water and if it goes dry, add little by little to get the thickness of your liking).

3. You can also reduce the water and add coconut milk towards the end of cooking, before the tadka.

4. Once the dal is cooked to your liking, temper/tadka it. I like my dal cooked completely, but holding its shape.

For tadka:
1.In a small frying pan or kadai heat oil/ghee.

2.  Add in mustard seeds and when they splutter add cumin seeds, curry leaves and broken chillies and fry for few seconds until the leaves sizzle. Pour it in to the dal. Stir and keep it covered for few minutes to infuse the flavour.

3. Just before serving garnish with chopped coriander leaves and serve it along with rice,roti etc.

Notes:
1.If you want it mild, reduce green chillies and chilli powder to you taste.

2. You can use any combination of dal or use the same recipe with mung dal.
Saturday, 16 June 2012

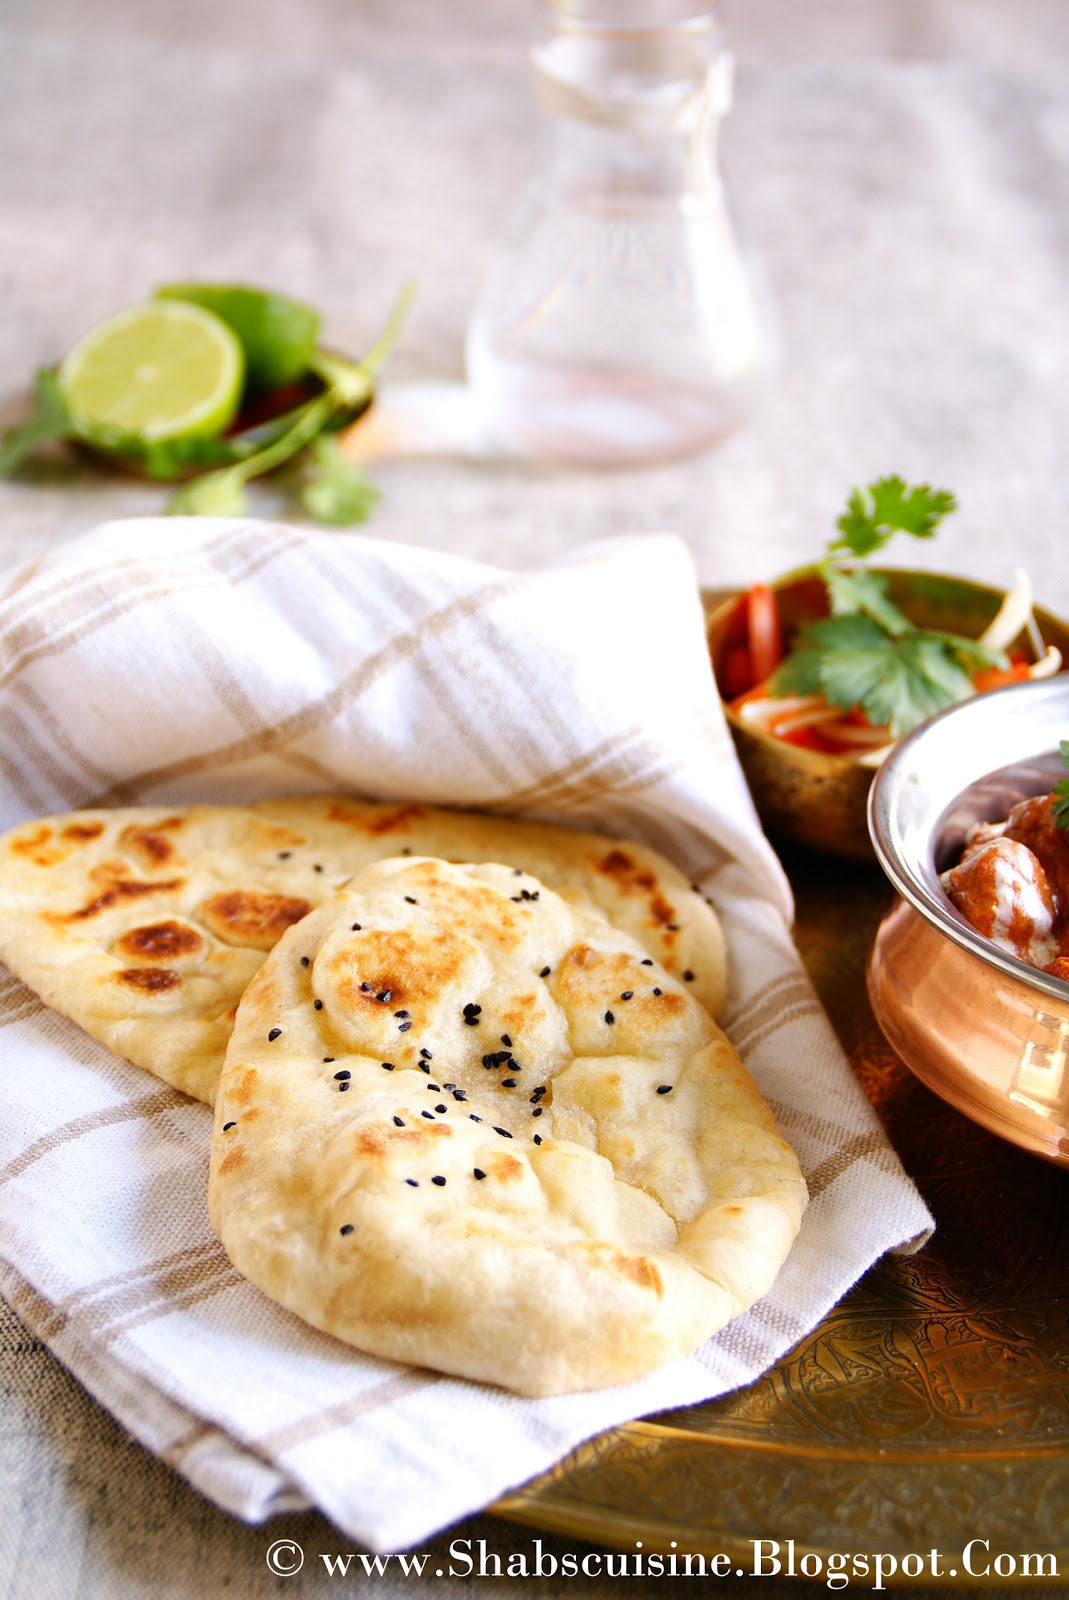
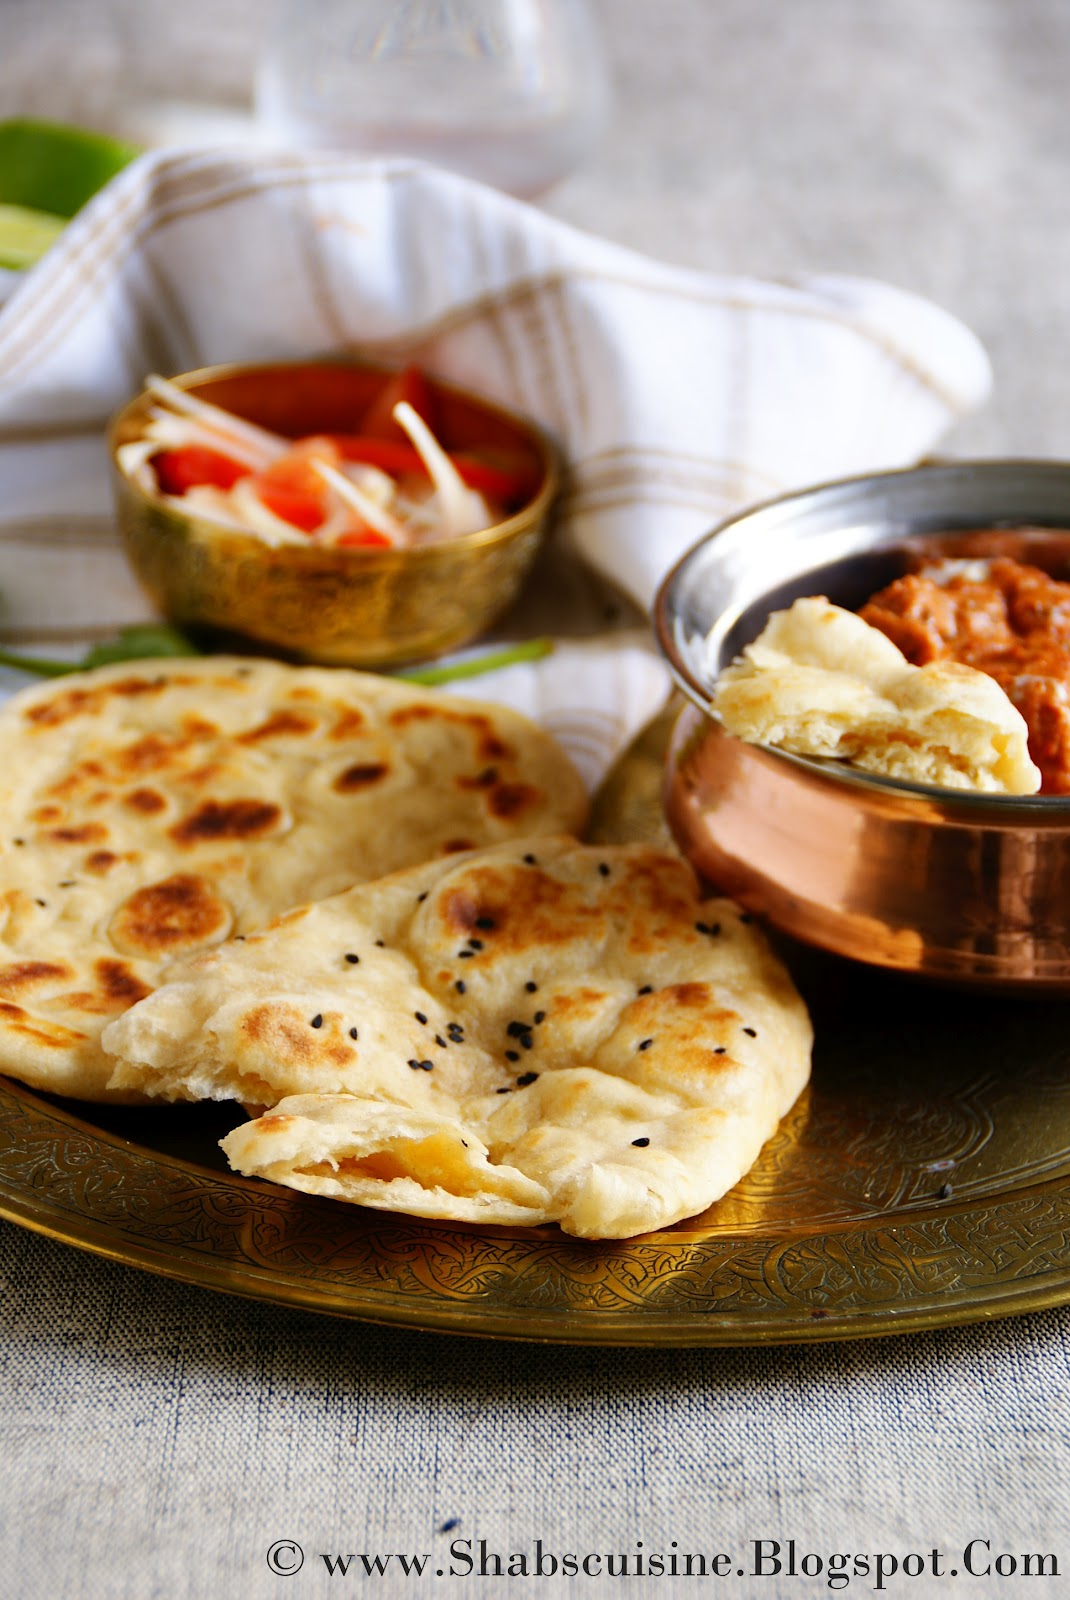
Naan (Indian Leavened Flat-bread)


Traditionally Naans are baked in the hot tandoor or clay oven. Although these are cooked in the conventional oven or the skillet it is just as authentic as the tandoor made naans. This recipe is adapted from one of my favourite Books – Indian Food & Cooking by Shehzad Hussain and this is one recipe that I  make over and over again and again. I have tried several different recipes for naan, and  this is the best of the lot and I am very happy with the result. 


As the traditional naan is baked in real hot oven, taste would vary slightly from the home made ones. The high heat in the tandoor results in perfect, chewy naan with a light crisp on the outside and soft, fluffy and slightly chewy bread. The dark brown spots are characteristic of naan bread which gives it a nice smoky flavour and is a bit difficult to achieve while being made in the conventional oven or the skillet. 
 
I usually make these in the skillet, as it is more easier, and brings out the perfect results. Over-cooking them can make them tough and chewy. The texture of your naan can vary depending on the time, the method used and the thickness of the dough you make. Play around with the thickness of the dough until you get it right. Will take a bit of practice, but soon you will reach there. I have used kalonji/onion seeds to flavour naans, but you can also use chopped garlic and coriander, another favorite combination of mine. . You can also stuff the dough with your favourite filling like cooked and seasoned minced meat, cheese, dry fruits and nuts etc. The recipe may look lengthy as I have explained it in detail, but believe me, it is very easy, and it is quick to make apart from the resting time of the dough.


Naan (Indian Leavened Flat-bread)
Makes 6-8
Ingredients:
¼ cup lukewarm milk
2 tsp active dry yeast
2 tsp sugar
450g / 3 cups plus 3 Tbsp plain flour
1 tsp baking powder
¾ tsp – 1tsp salt
150 mls / ½ cup plus 2 tbsp  (2/3 cup)milk
125mls / ½ cup natural plain yogurt, beaten
1 medium size egg, 55g, beaten
2tbsp melted ghee
flour for dusting
ghee for greasing
chopped coriander leaved and onion seeds (Kalonji) to garnish
Preparation:
1.Mix the yeast, sugar and warm milk and leave it aside to become frothy, takes around 15-25 minutes, depending on the heat of milk and quality of yeast.

2. Sift together flour, baking powder and salt.

3. Make a well in the dry mixture and add the yeast mixture, milk, yogurt, beaten egg and melted ghee. Slowly draw in the flour to the wet mixture and knead it gently for about 10 minutes to form a soft but pliable dough. If it’s too sticky, dust it with little flour. Cover the bowl containing the dough and keep it in a warm place until the dough doubles in size. To test, push a finger slowly into the dough – it should spring back.

4. Preheat the oven to 200 degrees C 10 minutes before baking.

5. Divide the dough into 6-8 portions. Roll out the dough on a floured surface. Make each naan slipper shaped or teardrop shaped, about 8-10 inches long.

6. Sprinkle with coriander leaves and press kalonji into the dough. Place on the greased trays and bake for about 9-12 minutes until you get brown spots here and there.

7. This naan can also be made in the tawa/skillet, the method I prefer and I follow. For that, place a tawa on medium heat and place the naan in. Cover the tawa with a lid. This step is important as covering the naan brings up the air pockets. Once it is cooked on one side, flip the naan over and cook until it gets black spots here and there, pressing down gently with a spatula. To get the black charred spots on, you could follow this way too - Once the naan is cooked on one side, cook the other side on direct flame using a tongs until you see charred spots on.

8. Brush with melted butter as soon as it comes off the oven/tawa and keep it covered with a clean cloth to keep it warm and moist. Serve hot with any curries.

Notes:
1.If the naans are being made in the oven, roll it slightly thick about ¾ cm thick else it goes a bit dry in the oven. And while making it on tawa, roll it quite thin almost like you roll for chappathi.

2. Do not over bake naans as they can get tough and chewy. It will be difficult to get brown spots in oven. Take them off, as little brown spots appear. If it goes bown through out, it can be tough.

3. I always prefer the skillet method and make my naans always in that. The pictures in the post are of naans cooked on skillet, cooked on both sides in skillet.

Tuesday, 3 April 2012

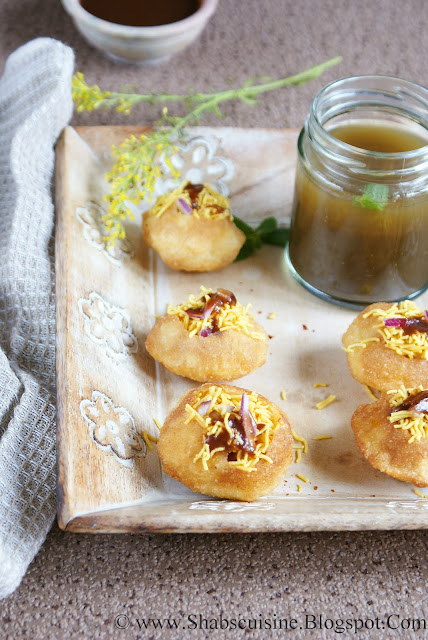
Pani Poori/Gol Gappa (Crispy Semolina pancakes with Mint Sauce and Tamarind Chutney) & some Spring Colours


Finally everything is falling in place. Until last week everything was in a jumble with my son’s birthday party arrangements. It was chaotic and involved lot of organizing. When it comes to organizing, I believe I am not a great person so I had to do things much early ahead and leave plenty of space ahead if in case something comes up. In spite of me being really stressed out, everything went really smooth and in time. Thanks to dear hubby and our loving friends who were there to help out. Now for a while no parties or gatherings and I am enjoying the beautiful weather with lot of sunshine. 


It’s officially spring and it’s quite warm that we could finally go out without our jackets and jumpers. Everything around is so bright, so beautiful. Flowers started blooming and trees sprouting. Even though winter wasn’t as bitter as yesteryears, it was pretty long and I always look forward to spring even with the onset of winter. I went out and shot some random pictures and some beautiful flowers in the park this morning. I very much enjoyed strolling in the park all by myself with the gentle breeze to caress and sunshine to warm up. After quite a while, I also saw many elderly people dog-walking. It is going to be summer again. While shooting pictures I also spotted something that looks like crow or is it a crow? It was perched high up in the tree and wasn’t that clear. The thought of English crows being black made me laugh, for no reason at all! 


Today, I am sharing something that’s apt for a good summer treat – Pani Puri/ Paani Poori/Golgappas. I made these quite a few times now following different recipes. The best of the lot was the recipe of Manjula Jain and I blindly follow her recipes. It works very well and the outcome is just fab. Pani puri or Golgappa is a famous Indian street food and are served as chats or snacks on roadside carts and are delightful treats especially on hot summer noon. These are crisp semolina fried puris filled with sev, potatoes, chutney and mint water that is super tangy. I have never been a great fan of Golgappas until I made my version at home. The ones I had from restaurants were too tangy for my taste and I never enjoyed it. So, you might want to increase the lime in your ‘pani’ to keep it sharp, just the way you would have it from street-side pani poori vendor.


Paani Puri (Golgappas)
Makes about 50-55 puris

For puris:
Ingredients:
¾ cup sooji/semolina
¼ cup plain flour,
1/3 cup water
salt to taste
Vegetable oil – to deep fry

Paani (for paani puri)
Ingredients:
¼ cup seedless tamarind soaked in ½ cup boiling water for an hour
1 heaped cup mint leaves, loosely packed
3 cups of water
1 ½ teaspoon roasted and ground cumin seeds
¼ tsp ginger powder
¾ tsp salt
1-4 green chillies
1 tbsp sugar
1-3 tablespoon limejuice (Add depending on your taste)
1 tablespoon coriander leaves
salt to taste

Imly ka chutney (Tamarind Chutney)
Ingredients:
1/3 cup tamarind soaked in 2 cups water for an hour
1 tsp roated and ground cumin powder
¾ tsp chilli powder
¼ teaspoon ginger powder
½ -  2/3 cup brown sugar
a pinch garam masala

Other ingredients:
2 large Potatoes boiled with a touch of turmeric and salt-  either mashed or chopped into tiny cubes
1 onion finely chopped
1 cup boiled chickpeas
Fine sev

Preparations:
To make Pooris:
1. Mix all the ingredients and knead to a stiff dough using water. Leave it aside covered with a damp cloth for about ½ an hour (Don’t miss this step). Knead again and divide the dough into 50 portions.

2. Roll each portion into thin flat round disks of about 3 cm and place them on a floured surface.

3. Heat oil in a deep pan. When it is medium hot, slide few pooris at a time into the oil. Gently press the pooris with a serrated ladle to puff them up. Once puffed, flip them over and fry golden. Repeat it with all the pooris and drain them on kitchen towel.

To make Paani (Tangy Mint water):
1. Strain the soaked tamarind and squeeze out as much as pulp as possible. Discard the residue.

2. To a blender add this strained pulp, mint leaves, green chillies, cumin powder, ginger powder and blend till smooth. Strain it.

3. To the strained mix, add sugar, lime juice, and mix rest of water and stir. Chill for few hours prior to using for flavours to blend well.

To make Imly ka chutney (tamarind chutney):
1.Squeeze out tamarind in strainer. Reserve the strained liquid and discard the residue.

2. To the strained liquid, add spices and sugar and boil for ten minutes or until it thickens slightly. Refrigerate till required.

To assemble:


1. Crack a small hole in the centre of each puri.

2. Fill it with little boiled channa, chopped onion, sev, little tamarind chutney and then immerse it into pani and eat immediately. You can also use your own choice of fillings including cooked moong sprouts.

Notes:
Fried puris can be stored in a closed container for about a month. If your puris go soggy, just warm them up for about minutes in a moderate hot oven to crisp them up.

Saturday, 11 June 2011

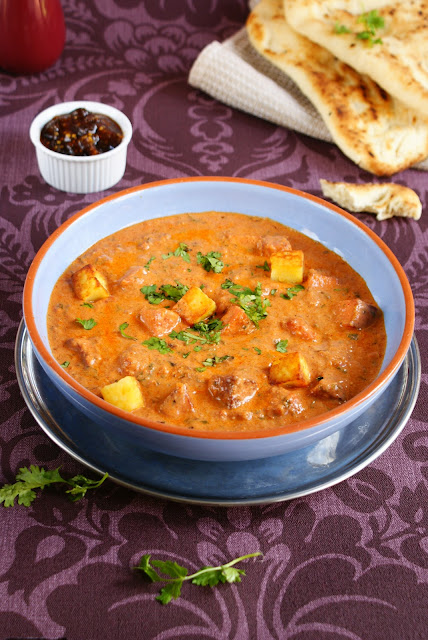
Paneer Butter Masala/Paneer Makhani


A recipe to treasure – Paneer butter masala is similar to butter chicken by taste and one of my favourites. It is a popular Punjabi dish, that you would come across any Indian restaurant and is generally loaded with cream to bring that buttery goodness. It is also known as paneer makhani, Paneer is Indian cottage cheese and makhan stands for Butter. I usually skip butter as we get that buttery taste just by adding cream. That is from my observation from numerous trials of making butter chicken and paneer butter masala. This recipe uses minimal cream, I just use 2 tablespoon, but you can add more if you wish.

N.B: Sorry I have to bore you with loads of pics, It's just that I am confused and can't decide which pic to choose!


Paneer Butter Masala
Serves 3-4
Preparation time: 10-15 minutes
Cooking time: 20 - 25 minutes

Ingredients:
250 gm paneer cut into 1”cubes
160g, 1 medium-large onion sliced thin
200g, 1 ½ large tomatoes or 2 medium size
25g, ¼ cup cashew soaked in ¼ cup hot water
2 tablespoon – 1/3 cup heavy cream
2-3 teaspoons red chilli powder (I used Kashmiri chilli powder. You can use cayenne, paprika or a mixtureof chilli powder to adjust the heat).
½ teaspoon cumin powder
1 - 1 ½ teaspoon garam masala powder
2 teaspoon dry kasuri Methy leaves (fenugreek leaves)
¼ teaspoon sugar
2 teaspoon minced ginger
2 teaspoons minced garlic
3 whole cloves
3 green cardamoms
2 small pieces cinnamon sticks
½ teaspoon cumin seeds
2 tablespoon chopped garlic
Oil/butter - as required.
Water – 1 ½ - 2 cups
2 tablespoon chopped coriander leaves
Red food colour – few drops
Salt to taste


Preparation:

1. Soak cashews in ¼ cup of hot water for around 15-20 minutes and grind them to fine paste.

2. Puree tomatoes in a blender to fine paste. Mix both and keep them aside. Also mix chilli powder, cumin powder, salt, 1/2 - 1 teaspoon garam masala powder, kasury methi, sugar into this tomato puree.

3. In a frying pan, heat 3 tablespoon of oil and fry paneer until golden, stirring them occasionally. This can be done in couple of batches.

4. In another sauce pan heat 1 tablespoon of butter (I used the oil that I fried paneer) and sauté the chopped onions until translucent and soft. Grind this also into a fine puree.

5. Heat couple of tablespoons of butter/veg oil in the same pan you sautéed onion and add cumin seeds. When they splutter, add cardamons, cloves, cinnamon and sauté until they leave aroma.

6. Lower the heat and sauté minced ginger garlic until the raw smell goes off. Add pureed onion and sauté for about 5 minutes until it starts to change colour and is void of moisture.

7. Add in tomato puree mixture and sauté till it becomes thick and oil clears from sides, around 10 minutes.

8. Add 1 ½ - 2 cups boiling water, and bring to boil, You can also add 1 ½ cups water and ½ cup milk here. (Here I added 1 ½ cup water first, the mixed colour to rest of the water and added slowly to get the right colour I wanted).

9. Add in paneer, reduce the heat and gently simmer for 5-7 minutes until the gravy thickens a bit

10. Add cream (room temperature) and cook for further 2 minutes. Sprinkle rest of garam masala and coriander leaves and serve hot with naan, paratta etc.

N.B: Food colour is optional. I added here to bring some colour to the dish, which otherwise is a bit boring. If food colour is not added, the colour will be orangish.

Few other great recipes that I came through:


Related Posts Plugin for WordPress, Blogger...