Showing posts with label Bread. Show all posts

Saturday, 19 November 2011

Chocolate Glaced Doughnuts

Someone at home has gone crazy on doughnuts, and it’s none other than my little picky eater! What surprises me is that he prefers the homemade ones and doesn’t like the shop bought ones. How much he trusts his mom, LOL. I have made doughnuts several times before, but I wasn’t really happy with the texture. Either it was chewy, or crispy and never do-nutty. Always had trouble getting it right and that’s when I thought, these are real tricky ones to get soft and right.

I have been trying few recipes one after the other and it was Ria’s recipe that was best of the lot. I followed the recipe to dot apart from using milk instead of water and the outcome was brilliant. I just had to leave my dough for few hours extra to rise. Inspite of  using new yeast, my yeast had trouble proofing. I also used a chocolate glace rather than a ganache. I am looking forward to make a baked version of doughnuts next time my son ‘demands’ me for some doughnuts. I am not sure how well the baked doughnuts are going to turn out, but it will be healthier than the fried ones for sure.
Chocolate Glazed Doughnuts
Recipes source: Institute Of Baking and Cake Art via
Ria Mathew
Makes 10-12


Ingredients: 250 g plain flour +2-3 tablespoons of flour
1 1/2 tsp  yeast
100 ml warm milk
3/4 tsp salt
60 g granulated sugar
1 tsp milk powder
40 g chilled butter
3/4 tsp baking powder
1 large egg,beaten
Oil for deep frying
Preparation:

1.Mix yeast, warm milk and 1 tablespoon of sugar and leave aside for until it develops bubbly froth on top. Add in remaining sugar and stir till it dissolves. (It normally takes around 15-20 minutes for the yeast to proof anfd to get a frothy solution. But mine took around 40 minutes. If your yeast dint proof , don’t continue baking, discard the solution and proof again. You can read more on proofing here.

2. Sieve flour, salt, baking powder and milk powder together.
3. Cut and mix fat with flour. Mix well till fingertips till it resembles breadcrumbs. 

4. Make a well in the centre & add yeast mix and beaten egg. Mix till well incorporated and you get a soft dough that is not sticky. If you feel the dough is sticky at this point, just sprinkle more flour & mix till it is not sticky anymore and knead well. Let it rest for and hour or till doubled in size(in a warm place). Again mine took around 3 hours to rise!
5. Once it is doubled, punch down the dough with your knuckles. Roll out into 1/2 inch thick and cut out shapes using a doughnut cutter or using 2 cookie cutters/bottle caps. Let it rest for another 40minutes- and hour so that it rises again. This resting time is very important for yielding soft donuts. The resting time will let the dough rise creating bubbles inside which makes the doughnuts softer.

6. Add oil in a pan about oil around 3-4 inch high and place it on a low- medium heat. When the oil is hot enough, add doughnuts and fry on both sides until golden. Before frying, test the heat of oil by adding a small piece of dough in to the oil. If it rises immediately, the oil is too hot. The doughnut will get browned too quickly, without the centre being cooked.
7. Drain on kitchen towel and serve as is or with a chocolate coating or a simple glace.


For Chocolate Glaze:
½ cup powdered sugar (icing sugar)
1 ½ Tbsp Cocoa powder
2 tbsp Milk/Water
Few drops of Vanilla Essence

Preparation:
 1. Sift together the powdered sugar and cocoa powder to avoid any lumps.

 2. Add in the milk/water and vanilla extract and mix to form a glaze.

 3.This glaze will thicken quite soon. In that case, add in few drops of milk to loosen it.

 4. Place the glaze in a deep bowl and dip the doughnuts halfway through in the glaze and  allow it to set for 10 mins. Incase you don’t like chocolate frosting, you can just roll them in caster sugar or icing sugar or make a thin glaze with icing sugar and milk and dip the doughnuts in them. Th edounut tastes best on the day it is made, I warmed it up in microwave for few seconds when I had it the next day.
 Tip:
1. It is best to store yeast in the freezer for its best effectiveness. Do not use yeast that has past its expiry date. It might have dead and will not yield good result. Please check the expiry date before using it in the recipe.

Monday, 16 May 2011

Chicken Bread


I couldn’t appreciate the UK weather more; at least for the time being. UK has one of the worst weather histories where it becomes so unpredictable; it rains; wind blows, sun shines, all on the same day! But since past few weeks it has been so sunny almost every day. Even though it got chilly on and off, we had loads of sunshine with a very comfortable temperature. So unlike UK! It’s still May and usually we don’t get lot of sunshine during April- May and would have to wait until July. Long Days and short nights! I am so happy that I can shoot my pictures as late as 8:30 pm now at sun sets around 9 pm which is never possible during winter where the sun sets as early as 3:40pm!


Anyways, chicken bread was something that I have been eyeing for a long time at Fatii Naaz’s place. She is one of my Social Network buddies and I was flabbergasted by the variety of food she makes. I wanted to give this bread a try ever since I saw at her place and I have seen many great reviews from her friends and followers. I found this bread, a hassle free, easy and a fun to make recipe. I really enjoyed making the pleats on the bread and it looked stunning.


When it comes to bread making, I usually proof my yeast before kneading and have always been comfortable doing it that way. But in this recipe I haven’t done any yeast-proofing; instead all dry ingredients are mixed, which includes yeast and then is churned to dough adding wet ingredients. I was a bit sceptical doing it that way, but went ahead with the recipe as mentioned. And it works!


Chicken Bread
Serves 5-6 people

Ingredients for dough:
4 cups Plain Flour (630g)
1 tbsp Yeast
2 tbsp Powder milk
1 tsp Salt
4 tbsp Oil
1 Large Egg
1 tsp Caster sugar
1 1/3 cups Lukewarm water (Can add 1-2 Tablespoon if required)
1egg for egg wash
1 - 1 ½ teaspoons of sesame seeds for sprinkling

Ingredients for chicken filling:
750g Chicken with bone, boiled with ¼ teaspoon turmeric and shredded – around 1 ¾ - 2 cups
1 medium Onion chopped, ½ a cup, 70g
3/4 - 1 tsp Salt or as required
1 tsp Black pepper
2 tbsp Coriander leaves
2 Green chilies chopped
½ teaspoon Garam Masala Powder
½ of a small green capsicum finely chopped, 1/3 cup
2 cloves of garlic, finely chopped
2 tbsp Flour
2 tbsp Butter
¾ - 1 cup whole milk

Preparations:
For the dough:

1. In a bowl mix together flour, salt, caster sugar, milk powder and yeast. Mix well using a fork or a wire whisk.

2. Make a well in the centre and add a lightly beaten egg and oil and knead to a medium soft dough with water. Leave to rise for a minimum of 2 hours or until it rises to double the volume. Punch it back and divide the dough into 2 or 4 parts. If you want large loaf, divide to two parts, and if you want medium size loaf, divide to four parts. I divided into 2 parts but I got two massive loaves. I would be making these again, making sure to divide the dough to four parts and making 4 small ones.

For the filling and Assembling:


1. Heat butter in a saucepan. Sauté chopped onion and garlic till soft. Add capsicum and sauté again till it goes soft.

2. Add flour, salt, black pepper and sauté for 2-3 minutes on medium heat.

3. Take the pan off heat and add milk. Stir well using a wire whisk. Return back to heat and cook until it thickens for around 10 minutes by continuous stirring. Once it is thick, mix in shredded chicken, green chillies, garam masala and coriander leaves. It will be sticky at this point. But once it is cooled down completely, it will be fine.

4. Remove the filling from heat and let it cool down completely.

5. Meanwhile flour the working surface. I use a plastic sheet for this as it is easy to transfer the bread to the sheet for baking with ease. Roll the dough into rectangular shape to a thickness of 6mm – 1cm depending on how thick you like your bread. Place the filling in the centre of the dough, horizontally leaving around 2 ½ inch space on both ends.

6. Snip the edges with scissors or knife and fold each snipped part from each side so that they overlap each other, making beautiful pleats. Tuck the ends tightly. See the Pictorial representation for guidance.

7. Transfer the bread on a cookie sheet lined with baking paper. You can also place the rolled dough on the baking sheet, then do the filling and pleating on the sheet if you find harder to transfer the filled bread on to the sheet from teh work surface. Brush the top with 1 beaten egg, sprinkle sesame seeds and leave to rise for about 20 minutes.

8. Bake the bread at 190 degree C for 30 – 35 minutes or until it turns golden all over. Take it out of oven, brush all over with butter, whilst hot and let it rest for 5 minutes. Serve with roasted or boiled vegetables, Mayonnaise and ketchup.

Saturday, 16 April 2011

Garlic-Basil Bread/ Garlic-Basil Ciabatta


Here is something so easy and yummy to munch on! I grabbed a ciabatta loaf the other day from a nearby store and thought of making some garlic bread which we really love. But I ended up making these as I had loads of basil lying around. So easy to make, and takes minimum effort and time.


Ingredients:

1 Medium ciabatta loaf, 160g
2 Tbsp butter at room temperature
1 Heaped Tbsp Mayonnaise (I used lighter than light mayonnaise here)
½ Tbsp light Olive oil
3 garlic cloves chopped very finely
2 Tbsp chopped basil
½ cup grated mild cheddar (reduce as per wish)
Salt – if needed
Pepper - to taste (I haven’t added any)

Preparation:


1. Slice ciabatta into 1 inch thickness at an angle. I got 8 pieces.

2. Mix together soft butter, mayo, minced garlic, olive oil and chopped basil. Spread this mixture on the ciabatta slices.

3. Place these Ciabattas on a cookie sheet lined with baking paper. Sprinkle grated cheddar on each slice and bake for about 8-10 minutes at 180 degrees until the cheese on top melts and starts taking golden patches here and there. Serve along with any soup or just have it as a starter. I served it alongside Moussakka.

N.B: You can use cheese of choice like Parmesan, Mozzarella. If you are using parmesan, you might need to reduce teh amount as the flavour is quite strong.

Saturday, 16 October 2010

Rosemary and Sundried Tomato Focaccia


Ever since I moved into the present flat of ours I have become kind of a plant aficionado. Most of the things around look edible in my eyes. I pluck few leaves and sniff them to see if they give out any scent, pluck berries, fruits etc and research on their details with some vague information. It wasn’t a waste of time at all. Among quite a few other stuffs, I also discovered that the outrageously growing bush all around our estate is Rosemary! Wow. I was quite exited and have been looking out for recipes that use rosemary. Talking about rosemary, it is a herb with quite hard and spiky leaves and that has a mint-like smell.


Among the entire set of recipes that I came across, focaccia was something that really fascinated me. I have also come across some lamb shank recipes that use rosemary for flavouring. Rosemary grows wildly like any grass or bush you see anywhere. I thought I have to use into something before I shift from here and decided to give a go with focassia. I referred James Martin’s recipe for the basic dough but tweaked it much by adding Sundried tomatoes in olive oil


Focaccia is an Italian staple which is enjoyed by old world bakers as a snack between laborious efforts of bread baking. Focassia has ever since made a name for itself as a premier sandwich loaf. This rustic recipe with rosemary and sundried tomatoes through out can be made into 2 smaller loaves or one large loaf and used in sandwiches ~ Sandwiches Panini and Wraps by Dwayne Ridgeway.
I made a swiss oatmeal soup to go along with it and it tasted great. I read focassia is something like a pizza base, but I thought it had its own difference. The bread was slightly chewy and crumbly rather than soft and tear-apart kind of texture. You can try your own variations of it like adding black olives, cheese, tomatoes, different herbs etc. Here is the one that I baked last week and this goes to 5th World Bread Day.
World Bread Day 2010 (submission date October 16)

Ingredients:

500g Bread flour (3 cups plus 6 Tablespoons)
1 ¼ teaspoons active dry yeast
1 tsp salt
1 teaspoon castor sugar
2 teaspoons finely chopped rosemary leaves
300 mls tepid (Lukewarm) water
3 Tablespoon olive oil (I used flavoured oil from the sundried tomato Jar)
75g (1/2 cup) chopped sundried tomato in flavoured olive oil
Few extra twigs of rosemary

Preparations:


1. In a large bowl sift flour, salt, sugar, yeast, chopped rosemary and mix well.

2. Add 2 Tablespoon of oil and rub well. Gradually mix in the water and knead for about 8-10 minutes until a soft, smooth and elastic dough forms. When the dough is smooth, smear the dough with the remaining tablespoon of oil. The dough should be elastic but not sticky at all.

3. Place the dough in an oiled bowl and cover it loosely with oiled cling film. Leave to rise in a warm place for about 1-2 hours or until the dough has risen well and has doubled in size.

4. Knock back the dough by punching it down with fist. Add chopped sundried tomatoes and knead for couple of minutes to incorporate them well into the dough.

5. Lightly flour a work area and roll the dough into ¾ inch thick and 9” round. You can also divide the dough into 2 smaller loaves instead of a making a single massive loaf. You can also make it in rectangle. Place it on a greased baking tray and leave it to rise for 30 minutes, or until doubled in size. If the weather is dry, like in the UK, cover it loosely with oiled cling film (If the cling film is not oiled, dough will stick to it and make a mess).

6. Meanwhile heat oven to 200 degrees Celsius. Take off the cling film and make several indentations with your fingers all over the surface of the dough. Lightly brush with olive oil (I used oil in the sundried tomato jar) and lightly insert few rosemary twigs into the indentations.

7. Bake for around 20 minutes or until golden brown all over. If you tap the underside of the bread at this point, I should sound hollow if it is well cooked. Cool on a wire rack and slice into wedges if made in circles or squares if made into large rectangles. Serve alongside your favourite soup or use it in sandwiches.

Notes:

1.I used plain flour instead of bread flour.

2. It is important to oil the cling film as the dough sticks to it otherwise.

Thursday, 22 April 2010

Low-fat Banana Bread


As I have mentioned in my previous version of banana bread which contained nuts and spices, this one is even a simpler one; a no nuts - no spice version and a cake with full of banana goodness in it. By the way, even if it says banana bread, it's texture and taste is just like that of a cake and not a bread. This recipe is also a low fat one compared to other banana breads around , using only 4 tablespoon of oil than many other cakes! It still was very moist due to mashed bananas in it. I gave half of the bread to my neighbour the day I baked them and they shared it with their guests. She told me all of them liked it and took the recipe from me. So, I share that same recipe here as well. In case you have some bananas lying in the corner crying for help, this fool-proof recipe would sure come handy.


Simple Banana Bread
Ingredients:
1 ¾ cup (250g) all purpose flour
1 cup granulated sugar
¾ tsp baking soda
¼ tsp salt
¼ cup (4 Tbsp) vegetable oil
5 Large bananas mashed (1¾ cups)
2 large eggs, lightly beaten with whisk
2 tsp vanilla extract/essence
1 lemon’s rind

Preparation:

1.Preheat oven to 350 degrees F (180 degrees C) and place oven rack to middle position. Cover the base and the longer side of a 1 kg loaf pan with a baking paper. Set aside.

2. In a large bowl combine the flour, sugar, baking soda, and salt. Set aside.

3. In a medium-sized bowl combine the mashed bananas, grated lemon rind, eggs, oil and vanilla. Mix well with a spoon.

4. With a rubber spatula or wooden spoon, lightly fold the wet ingredients (banana mixture) into the dry ingredients just until combined and the batter is thick. (The important thing is not to over mix the batter. You do not want it smooth. Over mixing the batter will yield tough, rubbery bread). Scrape batter into prepared pan. Bake until bread is golden brown and a toothpick inserted in the center comes out clean, about 60 minutes. Place on a wire rack to cool and then remove the bread from the pan. Serve warm or at room temperature. This bread can be frozen.

Sunday, 29 November 2009

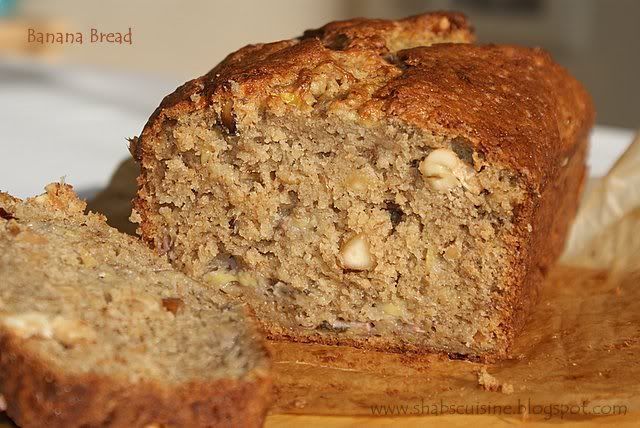
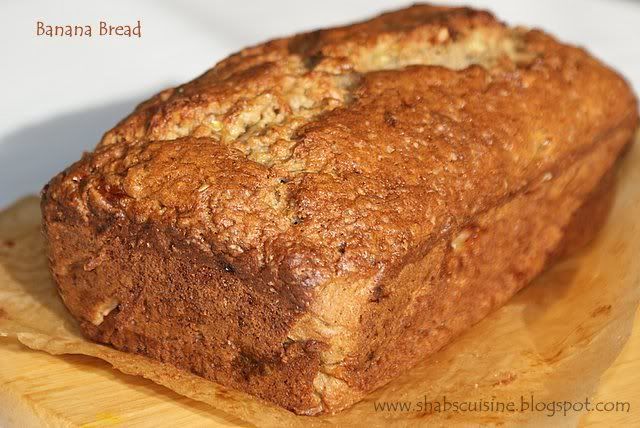
Banana Bread


What happens when you have a local farmers market nearby where you get fruits and vegetables at a very low cost?.....There will be more fruits and vegetables at home than required, and sometimes aiming to the bin! That’s what happened quite a few times at my home recently. The farmers market nearby is a whole sale market where we get loads of stuffs as cheap as chips.....Recently I had asked my HD to get some Bananas along with other stuffs and he bought more than dozen bananas! I am not much of a banana fan; I eat it once in a while but not so frequently to finish them all....So I had to think of options of how to use up the bananas without wasting any.....I used them in fruit salads, cornflakes, prepared some pancakes, drop scones and sometimes had them for breakfast!....I was still left with a few bananas which started developing black spots on them.....Then the thought of banana bread that recently appeared on many blogs struck me! Yes, I am Baking it........The Banana Bread, something that I was longing to try.... I then started googling for the recipe....googled and googled and got confused which one to follow since there were numerous amount of recipes........I wrote down many recipes, added and subtracted ingredients to my liking and finally referred www.Joyofbaking.com for the final recipe to see what I wrote down was almost the same.


I fell in love with banana flavoured cakes during my college days where I used to have banana muffins for breakfast. But after making the banana bread, I realised that the one I had in college just had the banana essence and dint have any banana in it. The recipe for Banan bread given here is very simple to follow and can be modified to suit your personal taste – you can omit the nuts if you don’t prefer them, or add more nuts, omit the cinnamon and add the spice of your choice, or omit it completely..... In this recipe I have used cinnamon powder and for nuts I used Brazil nuts even thethe original recipe calls for walnuts.. There is a story behind the using of Brazil nuts. There were only just enough amount of walnuts for baking. Lucky me, thought myself. Got all ready for baking, heated the oven, placed the walnuts on the sheet and popped it in the oven...When I was setting off with the other ingredients, came a phone call!! Guess who it was....Oh, not a surprise and not a minister...It was just my sis. But why do I have to mention it here?.....My sister, I don’t know how she does it, but always calls me at the worst possible hour......while I am sleeping early in the morning, or at midnight, or I am busy with something and running around like a headless chicken .........The phone kept ringing......I picked the phone and we started talking (The oven is still ON with walnuts in)....the talking went on for sometime until I sniffed a charred smell and made me think ‘Hey, what’s that funny smell all of a sudden?’......’Oops my walnuts’.....I dropped the phone and ran to the kitchen, and opened the oven, just to find my only walnuts turn into charcoal and smoke all over....So I had to find some substitute for the walnuts and used ended up using brazil nuts.... To be frank, even though brazil nuts are one of my favourites, I thought it just din’t click in this recipe...I thought the walnuts would give it the best crunchy bite... And for the cinnamon, I have been having too much of cinnamony stuffs, that I got bored of the taste. I am looking forward to baking banana bread again, but making sure I omit the nuts and cinnamon and add a tad more of vanilla extract.


The Bread, or rather a cake, was moist and had a true Banana flavour with a hint of cinnamon. It was deliciously crispy as soon it came out of the oven, but later on got moist, but yummy. The cake was quite dense cake and we loved it with tea. I tried toasting the slice of bread and drizzled with honey....It was great that way too...Well, while you choose the banana, go for the one that is really ripe, because the flavour of the banana intensifies as the banana ripens. My husband thought they were sweet enough for him, but I thought it was slightly less sweet for my taste. I would try adding a cup of sugar next time than ¾ cup. For checking the doneness, poke the bread at different place using a skewer. Since there is lot of banana in the bread, it will stick to the skewer and give a false idea

Banana Bread
Recipe adapted from: www.joyofbaking.com


Ingredients:
½ cup chopped nuts of your choice, preferably Walnuts or pecans
1 ¾ cup (250g) all purpose flour
¾ cup – 1 cup granulated sugar
1 tsp cinnamon powder
1 tsp Baking powder
¼ tsp baking soda
¼ tsp salt
½ cup (113 g) butter
450g banana, mashed (1 ½ cups), 4 Large ones
2 large eggs, lightly beaten with whisk
1 tsp vanilla extract/essence

Preparation: Courtesy of www.Joyofbaking.com

1. Preheat oven to 350 degrees F (180 degrees C) and place oven rack to middle position. Cover the base and the longer side of a 1 kg loaf pan with a baking paper. Set aside.

2. Place the nuts on a baking sheet and bake for about 8 to 10 minutes or until lightly toasted. Let cool and then chop coarsely.

3. In a large bowl combine the flour, sugar, baking powder, baking soda, salt, cinnamon, and nuts. Set aside.

4. In a medium-sized bowl combine the mashed bananas, eggs, melted butter, and vanilla. With a rubber spatula or wooden spoon, lightly fold the wet ingredients (banana mixture) into the dry ingredients just until combined and the batter is thick and chunky. (The important thing is not to over mix the batter. You do not want it smooth. Over mixing the batter will yield tough, rubbery bread). Scrape batter into prepared pan. Bake until bread is golden brown and a toothpick inserted in the center comes out clean, about 55 to 60 minutes (It took me 1 hour and 10 minutes). Place on a wire rack to cool and then remove the bread from the pan. Serve warm or at room temperature. This bread can be frozen.
Related Posts Plugin for WordPress, Blogger...