Saturday, 19 November 2011

Chocolate Glaced Doughnuts

Someone at home has gone crazy on doughnuts, and it’s none other than my little picky eater! What surprises me is that he prefers the homemade ones and doesn’t like the shop bought ones. How much he trusts his mom, LOL. I have made doughnuts several times before, but I wasn’t really happy with the texture. Either it was chewy, or crispy and never do-nutty. Always had trouble getting it right and that’s when I thought, these are real tricky ones to get soft and right.

I have been trying few recipes one after the other and it was Ria’s recipe that was best of the lot. I followed the recipe to dot apart from using milk instead of water and the outcome was brilliant. I just had to leave my dough for few hours extra to rise. Inspite of  using new yeast, my yeast had trouble proofing. I also used a chocolate glace rather than a ganache. I am looking forward to make a baked version of doughnuts next time my son ‘demands’ me for some doughnuts. I am not sure how well the baked doughnuts are going to turn out, but it will be healthier than the fried ones for sure.
Chocolate Glazed Doughnuts
Recipes source: Institute Of Baking and Cake Art via
Ria Mathew
Makes 10-12


Ingredients: 250 g plain flour +2-3 tablespoons of flour
1 1/2 tsp  yeast
100 ml warm milk
3/4 tsp salt
60 g granulated sugar
1 tsp milk powder
40 g chilled butter
3/4 tsp baking powder
1 large egg,beaten
Oil for deep frying
Preparation:

1.Mix yeast, warm milk and 1 tablespoon of sugar and leave aside for until it develops bubbly froth on top. Add in remaining sugar and stir till it dissolves. (It normally takes around 15-20 minutes for the yeast to proof anfd to get a frothy solution. But mine took around 40 minutes. If your yeast dint proof , don’t continue baking, discard the solution and proof again. You can read more on proofing here.

2. Sieve flour, salt, baking powder and milk powder together.
3. Cut and mix fat with flour. Mix well till fingertips till it resembles breadcrumbs. 

4. Make a well in the centre & add yeast mix and beaten egg. Mix till well incorporated and you get a soft dough that is not sticky. If you feel the dough is sticky at this point, just sprinkle more flour & mix till it is not sticky anymore and knead well. Let it rest for and hour or till doubled in size(in a warm place). Again mine took around 3 hours to rise!
5. Once it is doubled, punch down the dough with your knuckles. Roll out into 1/2 inch thick and cut out shapes using a doughnut cutter or using 2 cookie cutters/bottle caps. Let it rest for another 40minutes- and hour so that it rises again. This resting time is very important for yielding soft donuts. The resting time will let the dough rise creating bubbles inside which makes the doughnuts softer.

6. Add oil in a pan about oil around 3-4 inch high and place it on a low- medium heat. When the oil is hot enough, add doughnuts and fry on both sides until golden. Before frying, test the heat of oil by adding a small piece of dough in to the oil. If it rises immediately, the oil is too hot. The doughnut will get browned too quickly, without the centre being cooked.
7. Drain on kitchen towel and serve as is or with a chocolate coating or a simple glace.


For Chocolate Glaze:
½ cup powdered sugar (icing sugar)
1 ½ Tbsp Cocoa powder
2 tbsp Milk/Water
Few drops of Vanilla Essence

Preparation:
 1. Sift together the powdered sugar and cocoa powder to avoid any lumps.

 2. Add in the milk/water and vanilla extract and mix to form a glaze.

 3.This glaze will thicken quite soon. In that case, add in few drops of milk to loosen it.

 4. Place the glaze in a deep bowl and dip the doughnuts halfway through in the glaze and  allow it to set for 10 mins. Incase you don’t like chocolate frosting, you can just roll them in caster sugar or icing sugar or make a thin glaze with icing sugar and milk and dip the doughnuts in them. Th edounut tastes best on the day it is made, I warmed it up in microwave for few seconds when I had it the next day.
 Tip:
1. It is best to store yeast in the freezer for its best effectiveness. Do not use yeast that has past its expiry date. It might have dead and will not yield good result. Please check the expiry date before using it in the recipe.

Wednesday, 16 November 2011

Vendakka pachadi (Fried Okra in Coocnut and Yogurt Based Sauce)


Pachadi is a usually a coconut and yogurt based dish which is served along side plain boiled rice and other curries. It’s so easy to prepare, and can just whip it up in a jiffy. I normally prepare this to compliment any spicy curries that I serve along with rice just as my Malabar fish curry.  If you aren’t coconut fan, you can omit the coconut here and follow the recipe without using it.

Vendakka pachadi
serves 3-4
Ingredients:
150g  okra sliced into ½  cms, around 1 3/5 cups
1 ¼ cups thick creamy yogurt
½ cup water (appx.)
½ cup grated coconut
Ginger – a very small piece (optional)
Garlic – 1clove (optional)  
1- 3 green chillies
Vegetable/coconut oil – to fry okras
 
Tempering:
1 tablespoon coconut oil
2 dried red chillies
½ teaspoon black mustard seeds
2 twigs curry leaves
 

Preparation:
1.Grind coconut, green chillies, ginger and garlic (if using) adding 3-4 tablespoon of water if required.
2. Mix this coconut mixture with curd and set aside.
3. Slice okra into ½ cm thickness and deep fry until light golden. Drain excess oil in a kitchen towel.
4. Mix fried okra in the yogurt coconut mixture and set aside.
5. Heat oil in a small pan or karahi and splutter mustard seeds followed by curry leaves and red chillies. Add this tempered oil to pachadi and let it sit for few minutes before serving. You may need to add few tablespoons of water if mixture is thick. Adjust salt and serve alongside rice.

Saturday, 12 November 2011

Boondi Laddu


Hi friends, Hope you all had a great Diwali and Eid. I prepared these laddus just in time for diwali and planned to post on Diwali, but just got delayed. As wiLaddus need no special Introduction. It is one of India’s most popular festive sweets. These are seen all around Indian shops and bakeries and are served on festive and religious occasions . Apart from that laddus are also served along with evening tea and to offer guests. Boondi laddus are very popular with kids as well as adults alike. These are made of Chickpea flour and sugar.


Chickpea flour really does wonders, you know. Many delicious Indian sweets like Mysore Pak, besan Laddoo, Mohan tal, boondi laddu etc are all made of chickpea flour and sugar with flavourings and such.For making Boondi laddus, chick pea flour is mixed with water to make a batter and then fried in oil by passing through a perforated ladle or Boondi Karandi. These fried globules of batter are boondis, which then is soaked in a syrup of half-string consistency and then shaped into laddus. The trick lies in the batter consistency and the syrup consistency. For reference, please check out Hetal and Anuja’s video of preparing Laddu here:

Boondi Laddu
Makes 8-10
Ingredients:
For Boondis:
1 cup Besan /chick pea flour
½ cup water
Few drops of yellow colour
For sugar syrup:
1 cup sugar
½- 3/4  cup water
Others:
Vegetable oil for frying boondis- as required
½ tsp cardamom powder
1 tablespoon chopped nuts (optional)
1 tablespoon raisins (optional)
 Preparation:

1.Sieve Besan/chickpea flour to breakdown the lumps. Mix it with half a cup of water to a smooth batter. Add in few drops of yellow food colour and mix.
2. Mix the water and sugar in a heavy bottomed pan and heat on a medium flame.The syrup should be of half thread consistency.
3. While the sugar syrup is cooking, heat oil in a deep pan/Karahi on medium high flame. Test the temperature of oil by dropping few drops of batter. If it pops up immediately the oil is ready for making boondis .
4. Hold a Boondi Karandi or a perforated ladle 2 inches above the oil. Pour few tablespoons of batter and tap the ladle by moving the ladle all around the pan. If you don’t move the ladle and hold it just in place, boondis will clutter on top of each other.
5. Fry till the spluttering sound stops. Drain and put them on kitchen towel to drain extra bits of oil and then add to hot syrup. Stir boondis in syrup.  Increase the heat to medium before you make next batch of  boondis. Make boondis until all batter is used up and keep mixing when you add them in syrup.
6. Fry cashew nuts, raisins and add to the boondis. Add cardamom powder and mix well.  Crush them slightly in processor, just for couple of seconds. (You need some crushed boondis and some whole, that will make easier to shape laddus. Dont pulse them until you get a paste.This step is just optional. But I found making laddus easier by crushind a bit.) Let the mixture be warm enough to handle with hand, and then shape them into laddus. Let them rest for 3-4 hours to set and store in a airtight container.
Notes and Tips:
1. For making laddus, consistency of batter and sugar syrup is very important. For boondis don’t make the batter too thin as the boondis will form trails and not rounds. And don’t make it too thick too. Don’t fry the boondis till crisp; when you press them, it shud feel soft. If boondis are crispy, it will not absorb syrup well. Fry them just until it stop spluttering. Don’t fry till golden.
2. For sugar syrup, just boil the syrup until it is half thread. If sugar syrup goes beyond this stage, it will start crystallizing when you make laddus. If it goes beyond half thread consistency, pour few tablespoons of water and simmer until you get the right consistency. For testing the half thread consistency, dip the spoon in the syrup, and let it get cool enough to touch with hands. Touch it with your pointing finger and press it against the thumb and lift the finger slowly. If the syrup forms a string between the fingers and break in between, it is half string consistency. If you get a longer string of syrup, it is one string consistency.
3. Towards the end, if you find it difficult to shape laddus, heat the mixture gently until it is warm enough to touch and continue making laddus.

Tuesday, 1 November 2011

Aloo Paratta (Indian Potato Stuffed Bread)


Aloo parattas are one of the most popular Indian flat breads served for breakfast or dinner along with condiments like curd or pickle to go with. It is easy to make, with less flaws however you make it. I should accept the fact that it is a bit time consuming with all the kneading, rolling and making the filling to go along. If you find the process lengthy, you can prepare the filling a day ahead and then continue rest of the cooking th enext day. The taste is worth all the effort.
For the dough:
3 cups wheat flour (Aatta) (You can use plain flour or a mixture of both)
1 ½ cup warm water
2-3 tablespoon vegetable oil
Salt – as required, around ½ Tbsp
 
Stuffing:
600 g potatoes, 3 large ones, skinned and boiled
1 small onion, finely chopped
3 large cloves of garlic grated
1-2 green chilli finely chopped
¼ cup Coriander leaves, washed and finely chopped
1 teaspoon grated ginger
½ tsp coriander powder
¼ - ½ tsp cumin powder
½ teaspoon Red chilli powder
¼ teaspoon turmeric powder
Salt to taste
Extra ghee or vegetable oil if required, while cooking

Preparations:
For the Dough:
 1.Add salt to the flour and mix well. Add water and knead it for around 8-10 minutes until you get a soft and pliable dough. Apply oil on top and leave it to rest for ½ hour to 2 hours. This resting time will make the dough softer yielding softer chapattis. Set it aside while you make the filling.

For filling: 
1.Grate the potatoes using a grater. Grating potatoes is important to avoid lumps which are otherwise formed while mashing potatoes and result in bruised chappatis.
2. Place a pan on medium heat and add a tablespoon of oil. Thrown in chopped onions and saute until onion go soft. 

3. Add grated ginger,garlic, chillies and sauté till onion starts to take golden colour. Add chopped coriander leaves and sauté for a minute. 

4. Add spice powders, sauté for a minute. Add few splashes of water if it sticks to the pan. Add lime juice, followed by grated potatoes. Mix well and add salt of required. Once everything is well combined, turn off the heat. Let it cool down and then divide the stuffing into 10-12 balls.


For preparing the parattas:

1. Roll each dough little with a rolling pin, just enough to wrap a ball of the filling inside. Place a portion of potato mixture in the centre, bring all the edges together and twist it so that the filling doesn’t squirt while cooking the parattas. Repeat with all the dough and filling until both are all used up.
2. Flour the work surface with plain flour or wheat flour and flatten each stuffed dough to about 7-8 inch diameter. Heat a hot tawa and add a splash of ghee/vegetable oil. Place the parattas on hot tawa and cook  for couple of minutes on both sides until you see brown spots all over. Serve it along with plain curd, pickle and salad or any non veg dry curries or fries.

Note: I sometimes use half plain flour and half wheat flour for making dough.

Tuesday, 25 October 2011

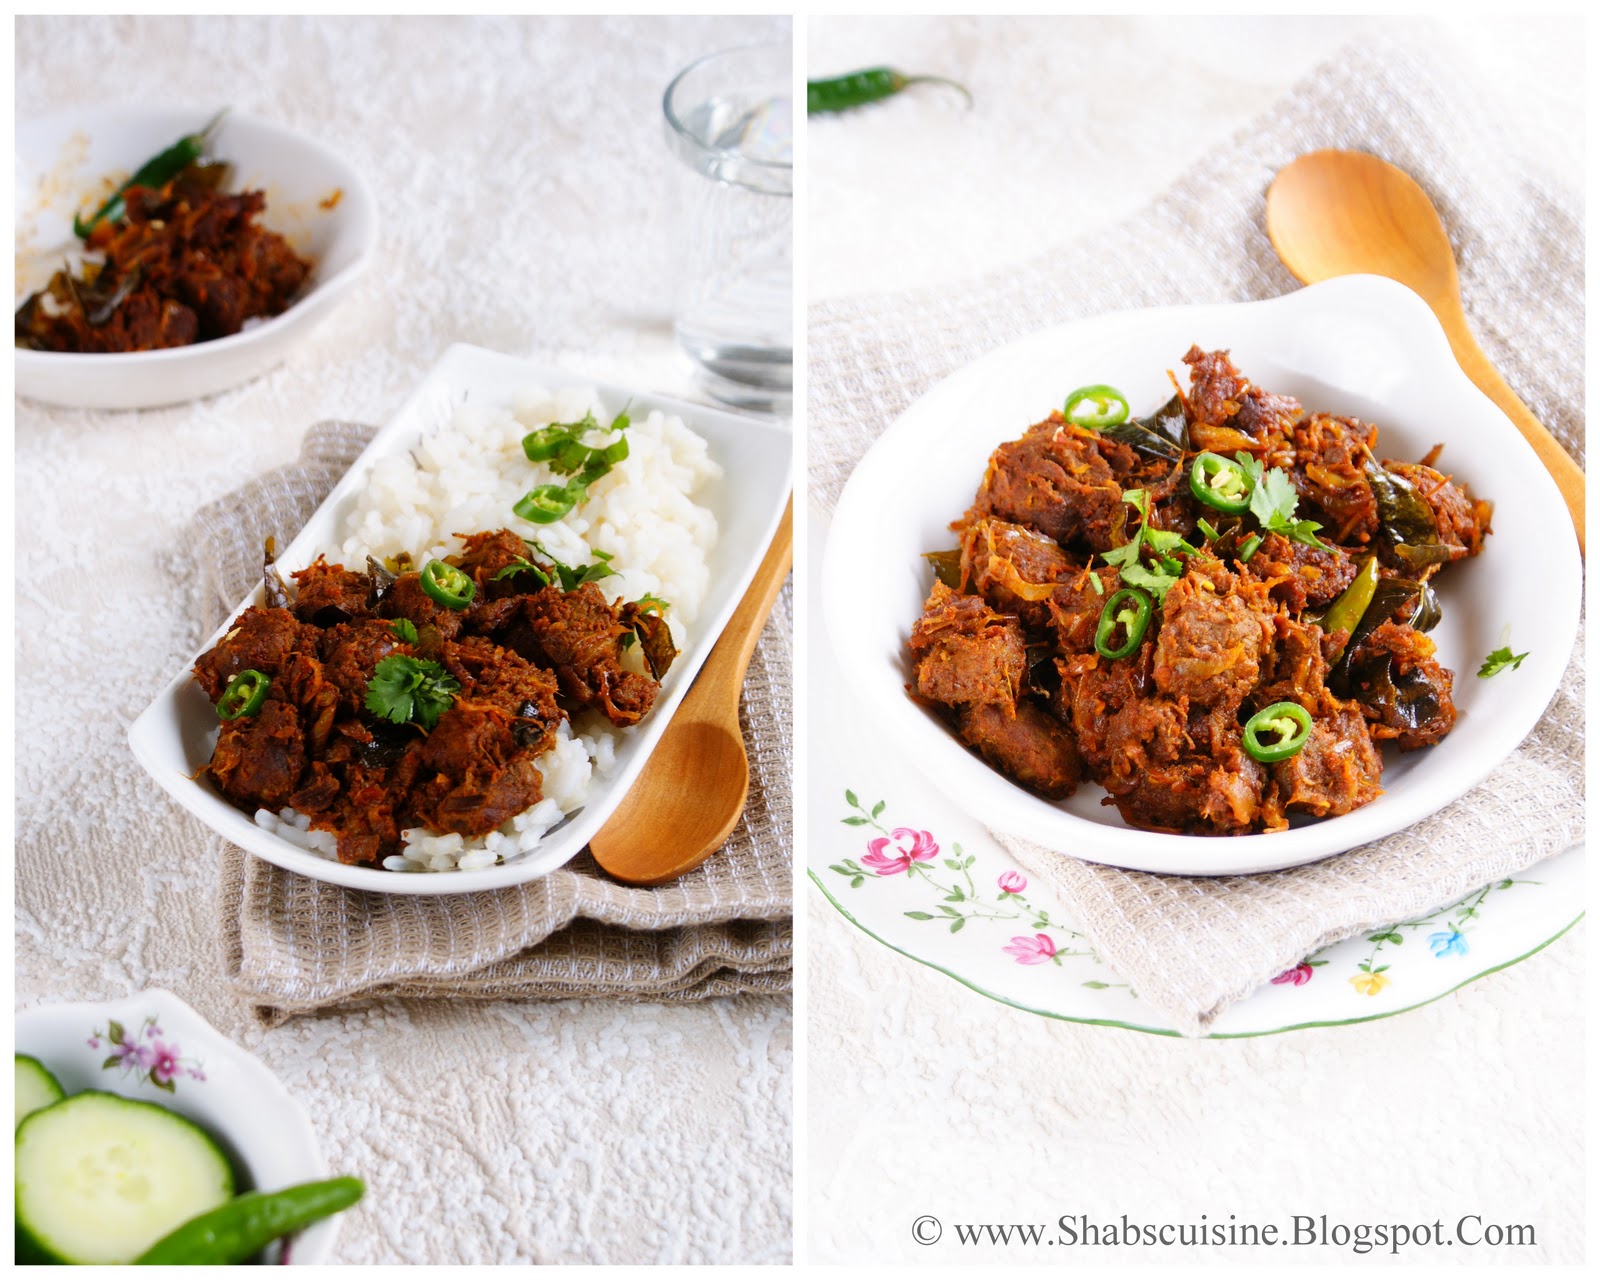
Spicy Beef Masala


Before I start, let me mention that this post is written specially for a fellow blogger, Neelu. She too hails from Kannur and these days it somehow happens that all Kannur-ians that I meet are somehow connected. After few chats with her, I realized that we are distant relatives and neighbours back home! We even went to same school in the same bus, and let me mention that was more than 2 decades ago - Coincidence. You can check out the same post at Neelu’s space here.
Even though, officially winter starts in December, I feel it is already at the doorstep. Freezing breeze and chilly mornings, early sunset and late sunrise, bright blue sky to grey cloudy sky all ring a bell about onset of winter. It’s been really sunny and warm couple of weeks back and within a week it dropped from 21 degrees to 6 degrees Celsius! Ahh! After all, that is what UK is notorious for- its unsettled and unpredictable weather. Hence, that wasn’t a surprise, in fact, very much expected. Here we get to feel and see all the four seasons, with all the obvious seasonal changes. We also get different varieties of seasonal fruits and veggies, at low cost when they are in season.  Although I don’t really make use of the seasonal fruit and veggies in cooking and baking, I try to eat them raw. It is autumn now with beautiful colours of fall foliage around, yet the chilly weather just keeps u wrapped up in the comfort of home.

I am a beef lover and I prefer it to chicken. Or am I getting too bored of taking chicken all the time? I don’t really know. Even though beef is my favourite, I don’t prepare it on regular basis as my men are not great fans of it and its high cholesterol content. But nothing would taste better than some spicy, hot meal or a soup during these cold days. Snug yourself on the sofa, covered up in a blanket, with a plate of these beef fry with some chappatis or rice  is a means of simple pleasure for me. That’s what I did the next afternoon I cooked this! So delicious!


A bit of cooking, little bit of photography and a lot more of chit-chat; that’s pretty much all I do these days apart from taking some initiative on my career side. As my little one started his school full time, I got lot more of spare time in hand. But my blogging is still creeping slower than ever. Anyways, this is a very simple recipe that requires just less than 45 minutes to prepare, really! This preparation of beef is one of my favourites. You can serve them along with rice, chappatis, pooris, parattas etc.
Spicy Beef Masala
Preparation Time:10 minutes
Cooking time: 30-35 minutes
Ingredients:
½ a kilo beef, cut into 1 inch cubes
Marinade:
2 teaspoon red chilli powder (Mild)
1 ½ teaspoons Coriander powder
½ teaspoon turmeric powder
5 large cloves of garlic, minced
1 inch piece of fresh ginger, minced
Salt  - as required
Others:
110g, 1 large tomato,
230g, 1 large onion
A handful of curry leaves
½ teaspoon pepper powder
¼ teaspoon garam masala
3 tablespoon coconut oil
Salt, as required
1-4 green chillies slit (Add as per your preference. If you like it mild, add them whole without slitting. )
¼ cup water or more if required.
Preparations:

1. Wash and drain the meat in a colander. Once drained, marinate with all the ingredients under marinade and leave it in fridge for a couple of hours of longer if you have time. You may cook it instantly if you are out of time.
2. Heat a pressure cooker, add meat along with chopped tomato and water and cook on low-medium heat until beef is 3/4th cooked with the pressure lid on.
3. Take off the lid and cook the meat slowly until the water is all evaporated and the meat is smothered in spices.
4. Heat another pan, add oil. Throw in sliced onions, slit green chillies and curry leaves and sauté till onion becomes golden.
5. Add meat along with the spices and cook slowly until it is dry and brown. Add pepper powder and garam masala and cook for 3-4 minutes.
The longer you cook, the darker the colour you get. Slow cooking usually brings darker coloured gravy. You can also cook this without pressure cooker which takes real long time, but always taste better than the pressure cooked one.
 If you prefer, you can also throw in a handful of sliced coconut along with onions.

Tuesday, 11 October 2011

American Super-light Pancakes

Some foods can be so simple and easy to make yet taste great. One such food is these superlight American pancakes. I know pancakes are not something so great to blog and brag about, but this one worth a post. There are number of ways to make pancakes and they vary from region to region, and countries to countries. These pancakes appear on our breakfast table most weekends and we just love it.

This is one of the simplest breakfasts you can make; instant and doesn’t require any fermenting or any waiting. These are not thin like French crepes, but soft, wonderfully fluffy, thick and sweet pancakes; literally speaking, cakes made in a pan! Other day, I added two handfuls of fresh handpicked blackberries, crushed into the very same batter and made some blackberry pancakes. They were awesome with all the goodness and sweetness from the berries. This is one recipe where you can rechristen it the way you would fancy, like adding few sliced bananas, raisins or apples into the batter. I also tried adding some orange rinds along with half a teaspoon of vanilla in the batter and it was great with a hint of orangey flavour.
 
 
You can serve with you own choice of  berries, honey, maple syrup, clotted cream or toasted bananas. I always almost serve it along with maple syrup and toasted bananas, which are favourites so far. For toasting bananas, once you are done with pancakes, in the same pan add a knob of butter. Slit a banana into two and place it on the hot pan. Let it get cooked on one side for a minute until it gets slightly caramelized, and then flip over and cook on the other side for another minute or two. You really enhance the flavour of banana by cooking it. Try it. If you want to make caramelized bananas, add some sugar to pan. When it caramelize and take an amber colour, add slit bananas and then cook on both sides until covered all over with caramel.

Ingredients:
175g self-raising flour
2 tsp baking powder
125g caster sugar
2 medium eggs
1 tsp vanilla essence or 1 pod of vanilla bean scraped
250 mls milk, whole or semi-skimmed
A pinch of salt
Softened butter or vegetable oil for cooking
 Preparations:

1.Sift flour, baking powder and salt into a large bowl. Stir in the sugar.
2. In another bowl, break eggs and gently whisk to break them up. Gradually add in milk and mix well. Add vanilla essence and mix again.
3. Make a well in the dry mixture. Gradually add this milk mixture in the flour; drawing the dry ingredients in as you whisk. Eventually you should have a slightly lumpy batter. Don’t  over mix the batter or it will make the pancakes heavy.
4. Heat a heavy non-stick frying pan until you feel a good heat rising. Add a small knob of butter and/or trickle a little oil along with butter, this will avoid burning of butter. Spoon 2-3 tablespoons of the batter into the pan. (If you want nice neat edges with perfect round shape, stand a 8 ½ cm (3 ¼”) round metal cutter in the pan to contain the batter. The resulting pancakes will resemble crumpets).
5. Cook until bubbles rise to the surface and the batter started getting firm. Loosen from the bottom of the pan and flip over for a few seconds to brown on the other side.
6. Repeat with the remaining batter, stacking the hot pancakes under clean towel until ready to serve.
Related Posts Plugin for WordPress, Blogger...