Chicken donut is one of snacks that sounded unique to me and I was quite fascinated by the whole idea of making it. As Ramadan is soon approaching, it would be great to try out new recipes before the holy Month begins. Did I tell you, I am going to spend my Ramadan and Eid in India for the first time, this year? Well, not really the first time, but the last time I fasted in India was when I was in 3rd grade, well over 2 decades and not much memory of that is in me. And I just managed to fast for a couple of days then as it was summer and was too hot. I am so looking forward to this Ramadan back home and I can’t tell you how much I am going to love it. Blogging and photo shooting will not work as much I do now or may be not at all. It would be perfect being away from UK this Ramadan and possibly few years of Ramadan as fasting hours are getting longer and it’s already 18 hours in the beginning of Ramadan, this year. It is going to be even longer next year and few years after that. I have been mourning ever since the last Ramadan about fasting this time of the year and the years to come when my parents suddenly planned to visit for a couple of months time. And I also planned to stick around, as usual.
Well, about these donuts, they are hassle free, and I sjust the matter of mixing up all ingredients and frying them. I know deep frying can put some off, but you can try this one with half the measurement. I tried these in a couple of days after I saw them at nimi’s space. Nimi is one of my childhood friends way back back in UAE and we got connected again few years back. She is a Cookbook author and her recipes are simple, unique and tastes great. These chicken donuts resemble alot like our Humble Uzhunnu Vada, aka Lentil Donuts. Dont get fooled byt its looks, it is quite varied in taste, texture and feel too. It’s just the shape, that is similar and we totally loved it, hot.
1/2 kg chicken mince, cooked with touch of salt and a pinch of tumeric
4-6 green chillies chopped
1 1/2 cups fresh bread crumbs
1 cup of all purpose flour
1-2 tbsp chickpea flour
1 tbsp ginger paste
1 tbsp garlic paste
1 ½ teaspoon garam masala powder
1 small onion, 60g, grated – ¼ cup
¼ cup chopped mint leaves
1/8 cup chopped curry leaves
¼ cup chopped coriander leaves
1 tsp black pepper powder
½ tsp baking powder
2 medium sized potatoes, 220g boiled and mashed
2 large eggs, 140g (lightly whisked)
salt to taste
Preparation:
1. Mix all the above ingredients with the minced chicken to make a dough.
2. Flour/ oil the work surface and flatten the dough with fingers to a thickness of 1 cm.
3. Cut out shapes with a donut cutter. Alternatively you can also flatten the dough in hand and using your finger, make a hole in the centre to get the donut shape. I made mine in hand, about 1 cm in width and 3 inches in diameter.
4. Heat oil about 3 inches high in a deep pan/Karahi.
5. Deep fry these chicken donuts in medium heat till golden brown. You would have to flip in between to brown both sides and it takes about 3-5 minutes per donut depending on heat.
N.B: Never turn the heat very high, as it would get your donuts charred outside and leaving the inner part uncooked. You can fry as many as th epan can hold, depending on the size of the pan you are using. Drain them on kitchen towel and serve hot along with ketchup, mayonnaise etc. This can be frozen and then reheated in microwave for later use.
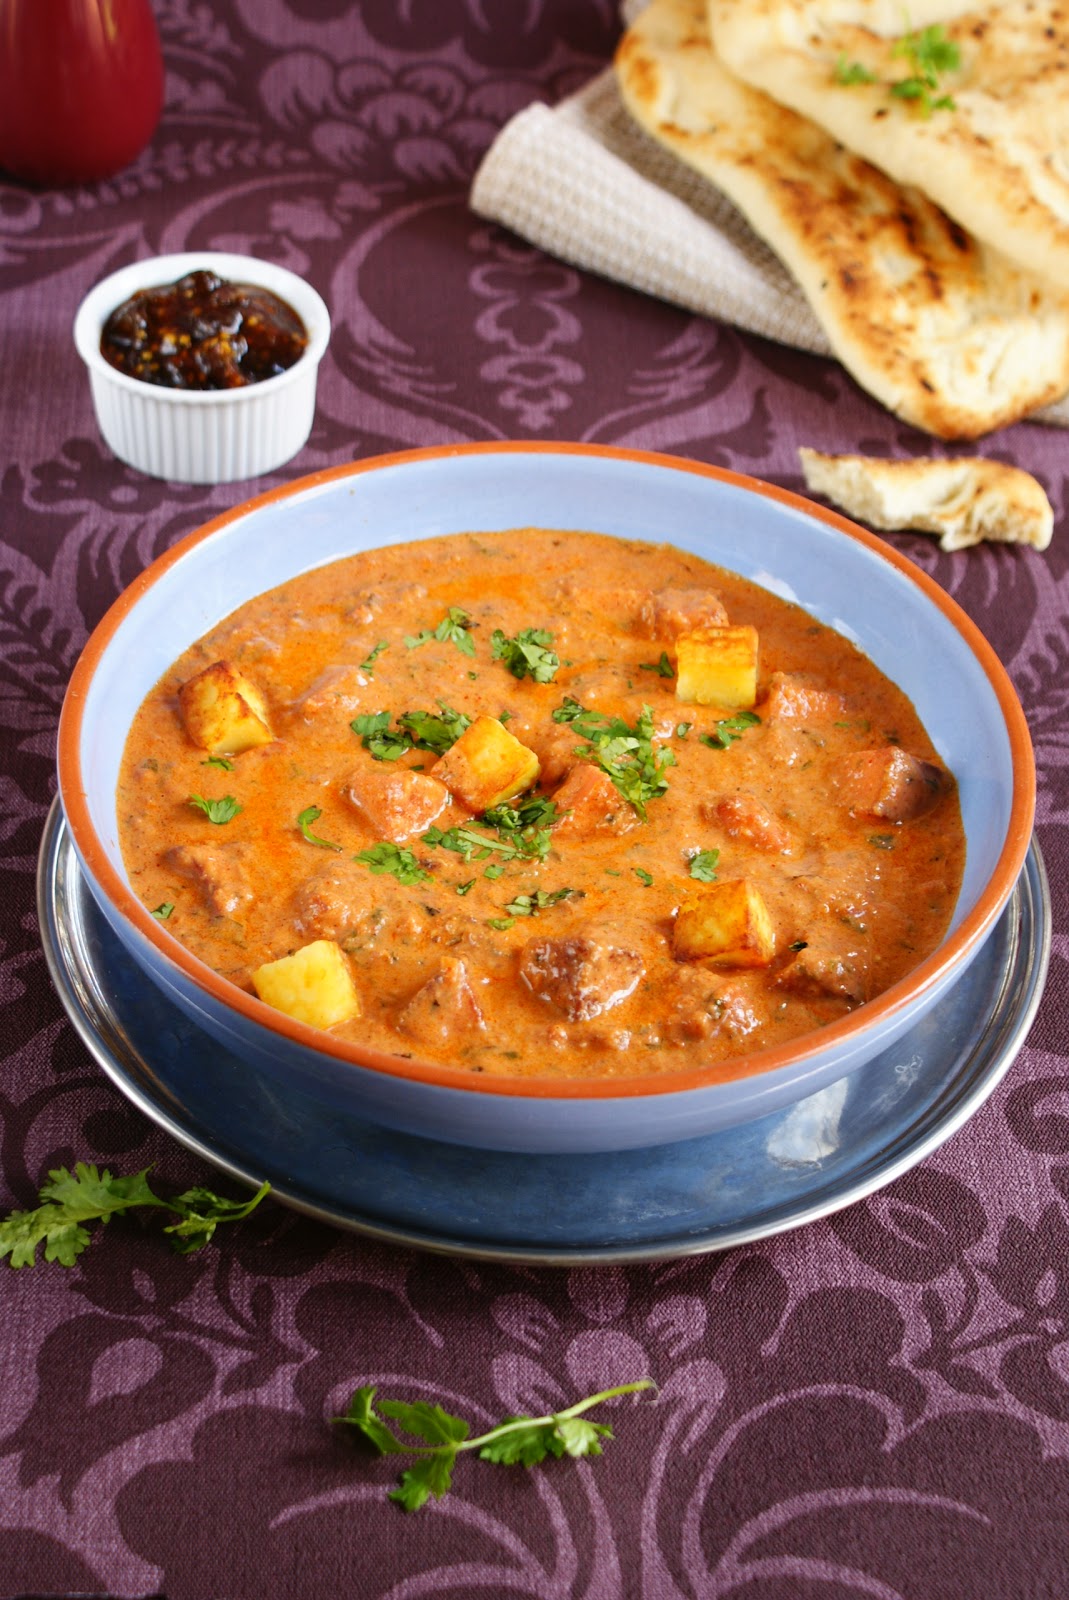
A recipe to treasure – Paneer butter masala is similar to butter chicken by taste and one of my favourites. It is a popular Punjabi dish, that you would come across any Indian restaurant and is generally loaded with cream to bring that buttery goodness. It is also known as paneer makhani, Paneer is Indian cottage cheese and makhan stands for Butter. I usually skip butter as we get that buttery taste just by adding cream. That is from my observation from numerous trials of making butter chicken and paneer butter masala. This recipe uses minimal cream, I just use 2 tablespoon, but you can add more if you wish.
N.B: Sorry I have to bore you with loads of pics, It's just that I am confused and can't decide which pic to choose!
Ingredients:
250 gm paneer cut into 1”cubes
160g, 1 medium-large onion sliced thin
200g, 1 ½ large tomatoes or 2 medium size
25g, ¼ cup cashew soaked in ¼ cup hot water
2 tablespoon – 1/3 cup heavy cream
2-3 teaspoons red chilli powder (I used Kashmiri chilli powder. You can use cayenne, paprika or a mixtureof chilli powder to adjust the heat).
½ teaspoon cumin powder
1 - 1 ½ teaspoon garam masala powder
2 teaspoon dry kasuri Methy leaves (fenugreek leaves)
¼ teaspoon sugar
2 teaspoon minced ginger
2 teaspoons minced garlic
3 whole cloves
3 green cardamoms
2 small pieces cinnamon sticks
½ teaspoon cumin seeds
2 tablespoon chopped garlic
Oil/butter - as required.
Water – 1 ½ - 2 cups
2 tablespoon chopped coriander leaves
Red food colour – few drops
Salt to taste
Preparation:
1. Soak cashews in ¼ cup of hot water for around 15-20 minutes and grind them to fine paste.
2. Puree tomatoes in a blender to fine paste. Mix both and keep them aside. Also mix chilli powder, cumin powder, salt, 1/2 - 1 teaspoon garam masala powder, kasury methi, sugar into this tomato puree.
3. In a frying pan, heat 3 tablespoon of oil and fry paneer until golden, stirring them occasionally. This can be done in couple of batches.
4. In another sauce pan heat 1 tablespoon of butter (I used the oil that I fried paneer) and sauté the chopped onions until translucent and soft. Grind this also into a fine puree.
5. Heat couple of tablespoons of butter/veg oil in the same pan you sautéed onion and add cumin seeds. When they splutter, add cardamons, cloves, cinnamon and sauté until they leave aroma.
6. Lower the heat and sauté minced ginger garlic until the raw smell goes off. Add pureed onion and sauté for about 5 minutes until it starts to change colour and is void of moisture.
7. Add in tomato puree mixture and sauté till it becomes thick and oil clears from sides, around 10 minutes.
8. Add 1 ½ - 2 cups boiling water, and bring to boil, You can also add 1 ½ cups water and ½ cup milk here. (Here I added 1 ½ cup water first, the mixed colour to rest of the water and added slowly to get the right colour I wanted).
9. Add in paneer, reduce the heat and gently simmer for 5-7 minutes until the gravy thickens a bit
10. Add cream (room temperature) and cook for further 2 minutes. Sprinkle rest of garam masala and coriander leaves and serve hot with naan, paratta etc.
N.B: Food colour is optional. I added here to bring some colour to the dish, which otherwise is a bit boring. If food colour is not added, the colour will be orangish.
Here is another evening teatime snack for you. I have minimally adapted this semolina cake from Anjum Anand’s cook book - Indian food Made Easy, that I borrowed from the local Library few weeks ago. (Oops! That reminds me I have passed the return date already, and I see myself getting a warning letter!). I remember Anjum preparing this cake on one of the cookery shows long back, while I used to live in Southsea, Portsmouth. It sounded very healthy and I wanted to give it a shot then and there, but again, it got lost in the lot of other bookmarked recipes I have. She, in her book mentioned it by the name ‘Handvo’, but when I searched for the recipe online, it showed me up many different versions of the cake which uses pulses rather than semolina. Whatever it may be, this cake was so easy to prepare with minimal work, and just the right type of snack for a lazy evening. I served with sweet aubergine pickle, my favourite, but you can also serve it alongside sweet mango pickle/chuntney.
Sweet mango pickle/chutney was what I came across on some site that is served with this type of cake. When I first thought about the sweet pickle being served with this savoury cake, all I thought was, Eeww, how would that pair?! But, it really does. A very good, tantalizing combination of flavours! Some things have to be endeavoured out in the weirdest way to comprehend its magical blend, isn’t it?
That also brings back an old incident into my mind. One of the colleagues of my husband, who hails from Malaysia, brought some fried beef on her way back from Malaysia. She was kind enough to offer us some of the food that she brought- an egg curry, some beef fry, that is all I remember. Both the egg curry and the beef were so sweet, I don’t know what they were, but both of them had loads of sugar in it. The Egg curry resembled our Humble Mutta roast and the beef was kind of caramelized with sugar. It was very strange blend of flavours and was unpleasant for me and couple of others who tried it as well!! You also get used to the taste you grow up with, whatever it may be.
Anyways, this so called semolina cake or Handvo is spongy on the inside and crispy on the edges. It is filled with variety of vegetables giving some texture and bits to bite into. It is light, filling and easy to assemble with less fuss. Handvo hails from the Gujarati community which used so lots of pulses and this is Anjum’s cheat’s version of it. No soaking and grinding of pulses is required here unlike the authentic handvo. You may use any vegetables you have in hand like courgettes, cabbage, beans, peas, carrots, spinach, fresh fenugreek leaves etc. You can also give it in your kid’s lunch boxes.
1.Preheat the oven to 200 degree Celsius. Line a 1 kg loaf tin with baking paper and oil it well.
2.Mix together semolina,vegetables, ginger, spices and salt.
3. Add yogurt and water and mix to make a thick batter. Taste and adjust the seasoning.
4. Heat oil in a small pan and throw in mustard seeds. Cook until they start to splutter, to throw in the cumin seeds. Let the cumin seeds leave its aroma. Stir this aromatic oil into the batter prepared earlier.
5. Stir in the soda bicarbonate and immediately pour the batter into the prepared tin. Sprinkle over the sesame seeds.
6. Bake in the preheated oven for about 35-40 minutes. As with any cake, insert a tooth pick/skewer in the centre of the cake. If the skewer comes out clean and the edges are crisp, the cake is ready. Let it cool in the tin, and then serve along with any sweet pickle and tea.
N.B: The orangey colour of the cake was not very appealing to me. The chilli powder, which is dark deep red and the turmeric imparted that colour vibrant yellow colour to tehe cake! I would definitely be reducing or not even using them both next time I make this.
This is one of the most easiest preparations of vegetable and it easily goes with plain rice. Mezhukku puratti in malayalam literally means ‘smeared in oil’. Mezhukkupuratti can be made with different vegetables like beetroot, carrot, raw plantains, yam, potatoes,brinjal etc but with slight variations depending on the vegetables. This recipe is minimally adapted from my one of my favourite books on kerala recipes ‘Lalitha Pachakam’ by Nikhila Govind.
Beans Mezhukkupuratti (Kerala Beans Stir-fry)
Cooking time : ¬10-12 minutes
Ingredients:
2 ½ - 2 ¾ cups, 300g French beans washed and cut into 1” pieces
1/3 cup finely chopped onion, a small onion
¾ teaspoon Black mustard seeds
2 Tablespoon coconut oil (Can substitute with veg.oil, but it is not authentic and the flavour would differ slightly)
1-2 Green chilli slit into 2
2 twigs curry leaves
2 dry red chillies crushed
3-4 garlic cloves finely chopped
¼ teaspoon turmeric powder (optional)
Salt to taste
¼ cup – 1/3 cup water
Preparations:
1. Heat oil in a saucepan or wok. When smoking hot, add mustard seeds. As soon as they splutter, throw in curry leaves and red chilli flakes. Sauté for few seconds making sure not to burn them.
2. Reduce the heat and add in chopped onions, garlic and green chillies. Sauté until onions and garlic go soft. Add turmeric powder and sauté for few seconds.
3. Add in the cut beans and salt. Stir well. Add enough water, cover and cook on low flame until the beans are cooked and water is all absorbed. Serve hot alongside rice. You can also add a handful of coconut slices while sautéing the onions if you like them.
Falafel doesn’t need much of Introduction. Even though this dish is of Middle Eastern descend, and supposedly known to be originated in Egypt, it’s widely popular throughout the world. Falafels are one of the most popular Arabic street foods found in nook and corner of Middle East. They are made of a chick peas and/or Fava beans and are flavored with herbs, garlic and spices. They have crispy and crunchy outer coating with fluffy texture and amazing plethora of flavors in every bite; just to make you crave for yet another bite. They are usually shaped into patties or round shapes and are then deep fried. I have come across many baked versions of falafels, which I have not ventured into. I am yet to gamble into baked version. Frying is quite easy but definitely unhealthy compared to the baked version I have to agree. This is my first success with felafels and I am quite happy with the result. Normally my recipes evolve and change as I keep making them, but I don’t think this would need any modifications. These were that good. I would try baking them, and the result would be updated as soon as possible, so that you can try the healthier version too.
I spent most of my childhood in UAE where these were available in plenty and I was grownup having these little golden nuggets once in every while. For me, falafel has lot of nostalgia to go with it. There used to be, and still there, this small Lebanese shawarma shop (Tarboush) few buildings away from the college where I studied and they had the best shawarma and felafil in town. I had the best falafel from there and never had a better falafel from any other place. Hot, crunchy and instantly fried I used to grab a few on the way back home. My siblings too love them. The guy there, used to give me couple of extras as I used to be a regular customer there. How sweet! Now looking back, I have never had the slightest of clue that these could be prepared at home too! Those days, when I never knew ABCD of cooking, who would have ever thought that these could be replicated at home?
Packed with flavours, I used to be addicted to this chickpea croquets and used to have them once in every while after my classes. We also get falafel sandwich wrapped in pitta bread or Arabic Bread, widely knows as Qubz or Khubz, drizzled with Tahini sauce and some lettuce, tomatoes and pickles gherkins. Nothing could beat the taste of freshly prepared falafel. It smells and tastes AWESOME! While preparing this, as usual, I started researching on net and came up with 359,000 results!!!Not that I went through all of them, but the ones that went through were different from another so that I started reading reviews. As usual, most of the recipes had positive and negative comments. So I had to mix and match many recipes according to the reviews. A day in falafel research. But was well worth it!
The recipe that I started following had flour added to it and while I was just about to mix the flour, I read somewhere that adding flour and egg is not traditional. So I opted out the flour and tested by frying a small ball of falafel without using flour and it worked. Loved the texture and tasted great. So I followed the recipe without adding flour. I have come across many recipes using canned chickpeas, but also read many reviews mentioning canned chick peas don’t work well. I am not in a position to clarify this further, but I won’t be using canned chickpeas for falafel. After all, it’s just the matter of soaking peas.
Ingredients:
1 cup , 200g dried chickpeas
1 medium onion, roughly chopped -120g
2 tablespoons finely chopped fresh parsley
1/3 cup finely chopped fresh cilantro
1 tablespoon chopped mint (around 10 leaves)
1 teaspoon salt or slightly lesser
1-2 green chillies
4 cloves of garlic
1 teaspoon cumin seeds
1 teaspoon coriander seeds
¾ teaspoon baking soda (Soda Bicarbonate)
¾ teaspoon sesame seeds
Vegetable oil for frying
Preparations:
Checkout this awesome video of falafel preparation by Titlinihaan, suggested my cousin, Saleema.
1. Wash chickpeas, put them in a large bowl and top the bowl with cold water to cover them by 3-4 inches. Let them soak overnight or 12 hours and then drain them completely in a colander.
2. Using a pestle mortar, roughly crush cumin and coriander.
3. Place the drained, uncooked chickpeas in the bowl of a food processor fitted with a steel blade. Process until you get grainy mixture, that resembles breadcrumbs. Tip the minced chickpeas into a bowl. Keep it aside.
4. Add roughly chopped onions, chopped herbs, chillies, spices and garlic into the food processor again and pulse until coarse. Add minced chickpeas into this and pulse until well combined. Mixture should not be fine, but grainy as couscous.
5. Tip the whole mixture into a large bowl. Sprinkle in the baking soda, sesame seeds and salt. Mix well using a spoon until thoroughly combined. Cover and refrigerate for a minimum of 1 hour. (I am not sure what the wait is for, but I read in many places that the mixture needs to be kept aside for sometime before frying. Absolutely no harm in experimenting with a little mixture, but I forgot to do that. So fired them all after an hour).
4. Form the chickpea mixture into balls about the size of walnuts or patties or use a falafel scoop to form shapes. I formed balls with 2 tablespoon of mixture.
5. Heat 3 inches of oil in a deep pan or wok and fry 1 ball to test. Oil should not be too hot so that you get felafels that are cooked only outside leaving the inside uncooked. Keep the heat to medium and fry the balls until they are almost brown. Drain on paper towels.
6. Serve along with Tahini sauce or you can also serve as sandwiches. For falafel sandwich, stuff pita bread of Khubz with falafels, chopped tomatoes, onion, green pepper and pickled gherkins and then drizzle with tahini sauce. You can use choice of vegetables you like. Yum!
Tahini Sauce
Preparation time: 5 minutes
Serves: 4-5
Tahini sauce is one of the easiest dips ever, takes under five minutes to whip up and can be prepared ahead of time. It is made of raw tahini which is sesame seed paste and is easily available in any Asian or Middle Eastern Stores. Tahini is also the main ingredient for hummus, Moutabbel and many Middle Eastern dishes. Tahini is slightly bitter in taste, so to mellow down the bitterness and add flavor, lemon juice and/or yogurt is added. You can thin out the sauce by adding water according to your preference. It varies from person to person and my recipe here calls for slightly a thicker version, as thick as yogurt. Once you get the basic recipe in hand, you can add more lemon juice or yogurt to mellow down the unpleasantness of the sauce to your liking. I have given two ranges of the ingredients, start using lesser amount at first and then increase it to suit your palette. I have used the lower range throughout here, except for water where I used 3 tablespoons.
Ingredients:
¼ cup tahini paste (sesame seed paste)
1/3 – ½ cup yogurt
2-3 tablespoon of Lemon juice
½ teaspoon salt or as required
2- 4 tablespoon water
Preparations:
1. Stir the bottle of tahini paste well prior to use as the oil stays on top and the paste sediment at the base. In a bowl, add the required amount of tahini paste.
2. Add lemon juice and stir. The mixture will start getting real thick and start to get lumpy.
3.At this point, add yoghurt and salt and mix well using wire whisk to get a smooth sauce.
4. Add water and thin it out as per your preference. I added 3 tablespoons.
N.B: The sauce keeps well in the fridge. But it tends to get thicker when refrigerated, so you would need to thin it out with water.
I and salad don’t go well together most of the time unless they are sinfully dressed up. I love dressed salads, just like this one. Pesto and mayonnaise is a varied combination and we absolutely loved it. This is a fresh salad that is fragrant, mild, creamy and bursting with flavour. The nutty tasting pesto with fragrant basil and mayonnaise pairs well with this pasta salad. It is a meal in itself and very filling hence this salad found its way to one of my hubby’s lunch box menu as well. I came across this simple recipe on the pack of frozen prawns and so the recipe definitely has prawns in it. For vegetarian option, Just opt out Prawns. I can see myself making different salads with same pesto - mayo drssing. How about new potatoes added to these pastas?And chicken instead of prawns?Adding some cooked pulses like cannellini, Garbanzo etc.?Many options and I am sure they will taste as good as this one.
Prawn and Pesto Pasta Salad
Serves 2 as a meal or 4 as side.
Ingredients:
200g, 1 ¼ cup Cooked prawns
125 g any pasta shapes, I used my favorite - Penne.
100g, 6 cherry tomatoes quartered
½ cup, 100g canned sweet corn
2 spring onions, chopped into rings
3 Tbsp Mayonnaise
3 Tbsp shop bought pesto
Preparations:
1. Cook pasta according to packet instructions. Drain and let it cool.
2. In a bowl, add cooked pasta, cooked prawns, corn, tomatoes, spring onions and stir well.
3. Add mayonnaise and pesto sauce and mix well. Adjust salt and add pepper powder if desired.
Notes:
1. You can adjust the pesto depending on how strong you like the flavour. I love the flavor of basil and hence added much. You can reduce it to 1 or 2 tablespoons instead of 3.