
Sometimes it is
the simplest of recipes that takes time to perfect, to master. For me, it has
always been so. Partly, it might be due
to me taking the simple recipes for granted. And partly I may be careless
dealing with easy recipes and don’t pay enough attention. Or am I over-confident?
I don’t know, but I almost always screw up simple recipes. I handle complicated
recipes at ease as I pay too much of attention, care and take good amount of
time preparing it. But when it comes to easy recipes I have always been a
sucker!! I rush into making it, carelessly throwing in ingredients and then
ruining the entire dish or rather unappealing. Dal was a constant victim of
such careless preparation. So this time, I planned to do everything slow,
taking time and care and adding my love while preparing it. That was it. It was
just the way I want. When you cook
something, you have to cook with love for it to be tasty. That is not just saying,
that is the truth. One should love what you are cooking, for the outcome to be
good.

One of my friends
who hail from Pakistan called fouziya prepares very good dal curries. She
prepares them at a fast pace, randomly throwing in stuffs, but her recipes
always turned out very tasty. She had given me her recipes; I tried them quite
a few times long ago but I never got it right. Now that I have been cooking for
a while and learned to cook by instincts rather than sticking to a recipe, I
should be able to get those recipes right now. I should try them again.

Dal has always
been my easy way out when I am in no mood to cook. It is simple, healthy and
requires less effort and time. I prepare them quite often to include great
protein in our diet especially when we cut down on our meat intake. This is one
of the easiest of dal curries that I prepare for rice and roti. I usually add
potatoes, but this time I opted it out as the husband has been repeatedly
asking me to prepare dal without potatoes. This is the kind of dal my mother makes.
She makes it quite watery for having it with rice, but I like it slightly
thicker, so I use more lentils, less water. This could go even thicker if you reduce the
water content. You could also reduce the water and add little coconut milk once
the lentils are cooked for a different taste.
I usually slow cook
dal over low heat for a good amount of time as pressure cooking gives a
different texture to the gravy. When you
pressure cook the lentils, you can see that it gets thicker as it sits. Hence, we
would have to loosen the curry later on by adding water which I feel spoils the
taste of the curry. But with lentils
being slow cooked in a saucepan retains its texture and flavour throughout and doesn’t
set or become thick later on. You also get creamier dal when you slow cook dal
and you can control the amount of water that goes it giving it the right
consistency.

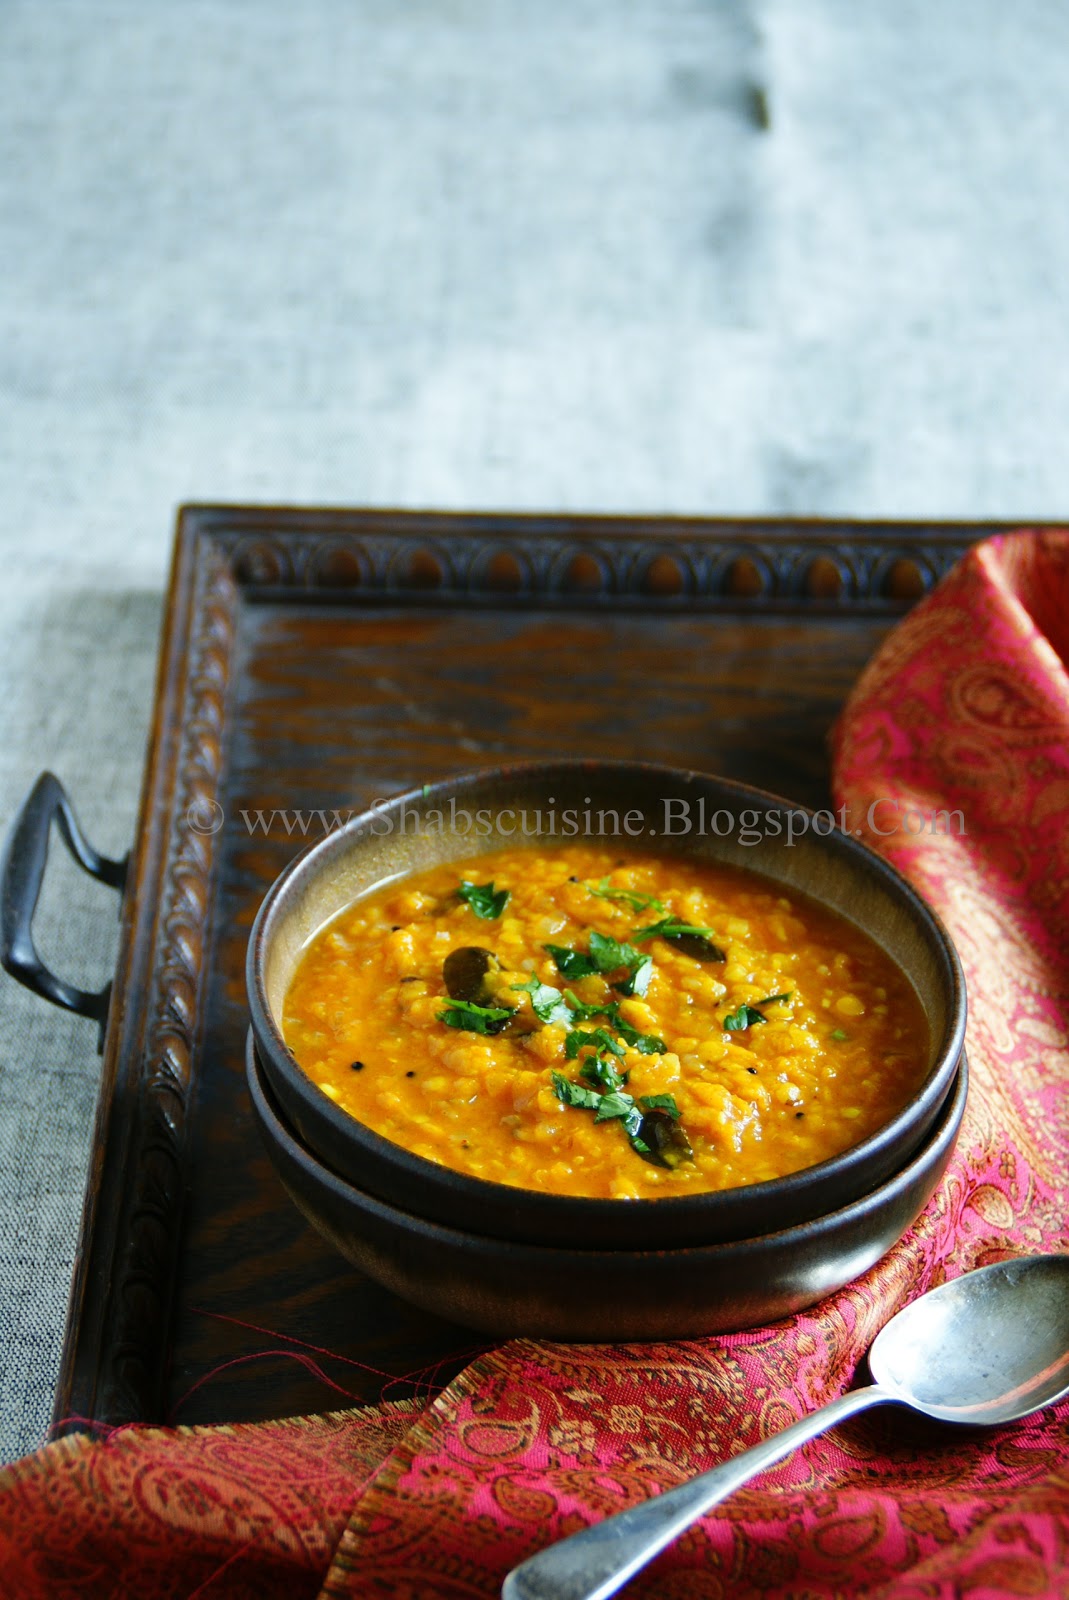
Tadka dal is a
popular Indian dal curry, which in simple words means tempered dal curry. I guess some call this dal fry as well. Any
variety of dal could be used for preparing the curry and then temper it using
any blend of spice. I usually prepare it using masoor dal, toor dal and moong dal (Green
gram dal). You can also mix 2-3 lentils, but water should be adjusted accordingly. Spices are tempered in ghee or oil to release
their flavour and this tempered oil is added to the curry imparting their
flavour and aroma to the curry. The spices used differ from place to place and
people and accordingly there would be slight variation. Nevertheless, this
effortless dish is comforting and is a staple food in India.
This post also goes
for the event My legume love affair originally started by Susan of The wellseasoned cook, being hosted by Sra of whenmysoupcamealive.

Tadka Dal
Serves 4
Preparation time: 10 minutes
Cooking time: 30-40 minutes
Ingredients:
1 cup split red lentils
1 ½ large tomato chopped, 150 g
1 large onion chopped, 200g
3 large cloves of garlic, chopped
2 ½ - 3/12 cups water
1 large potato (optional)
1 teaspoons mild chilli powder or paprika
½ tsp turmeric powder
1-3 green chillies or omit it if you want it very mild
salt – as required
1 tsp oil
To temper (Tadka):
1-2 tbsp coconut oil/vegetable oil or ghee
½ tsp black mustard seeds
2 twigs curry leaves
¼ tsp cumin seeds
1-2 broken red chillies
To garnish:
Chopped coriander leaves.
Preparations:
1. Wash lentils in several changes of water and soak for ½
an hour. Drain the water. Wash and cut the potato into 4 or 6 pieces, if using.
2. Place the lentils with all other ingredients except
the tadka in a medium saucepan and bring to boil. Reduce the heat, cover and
simmer until the dal is cooked and the gravy is thick. (First add 2 ½ cup of
water and if it goes dry, add little by little to get the thickness of your liking).
3. You can also reduce the water and add coconut milk
towards the end of cooking, before the tadka.
4. Once the dal is cooked to your liking, temper/tadka it. I like my dal cooked completely, but holding its shape.
For tadka:
1.In a small frying pan or kadai heat oil/ghee.
2. Add in mustard
seeds and when they splutter add cumin seeds, curry leaves and broken chillies
and fry for few seconds until the leaves sizzle. Pour it in to the dal. Stir
and keep it covered for few minutes to infuse the flavour.
3. Just before serving garnish with chopped coriander
leaves and serve it along with rice,roti etc.
Notes:
1.If you want it mild, reduce green chillies and chilli
powder to you taste.
2. You can use any combination of dal or use the same recipe with mung dal.


