Thursday, 22 November 2012

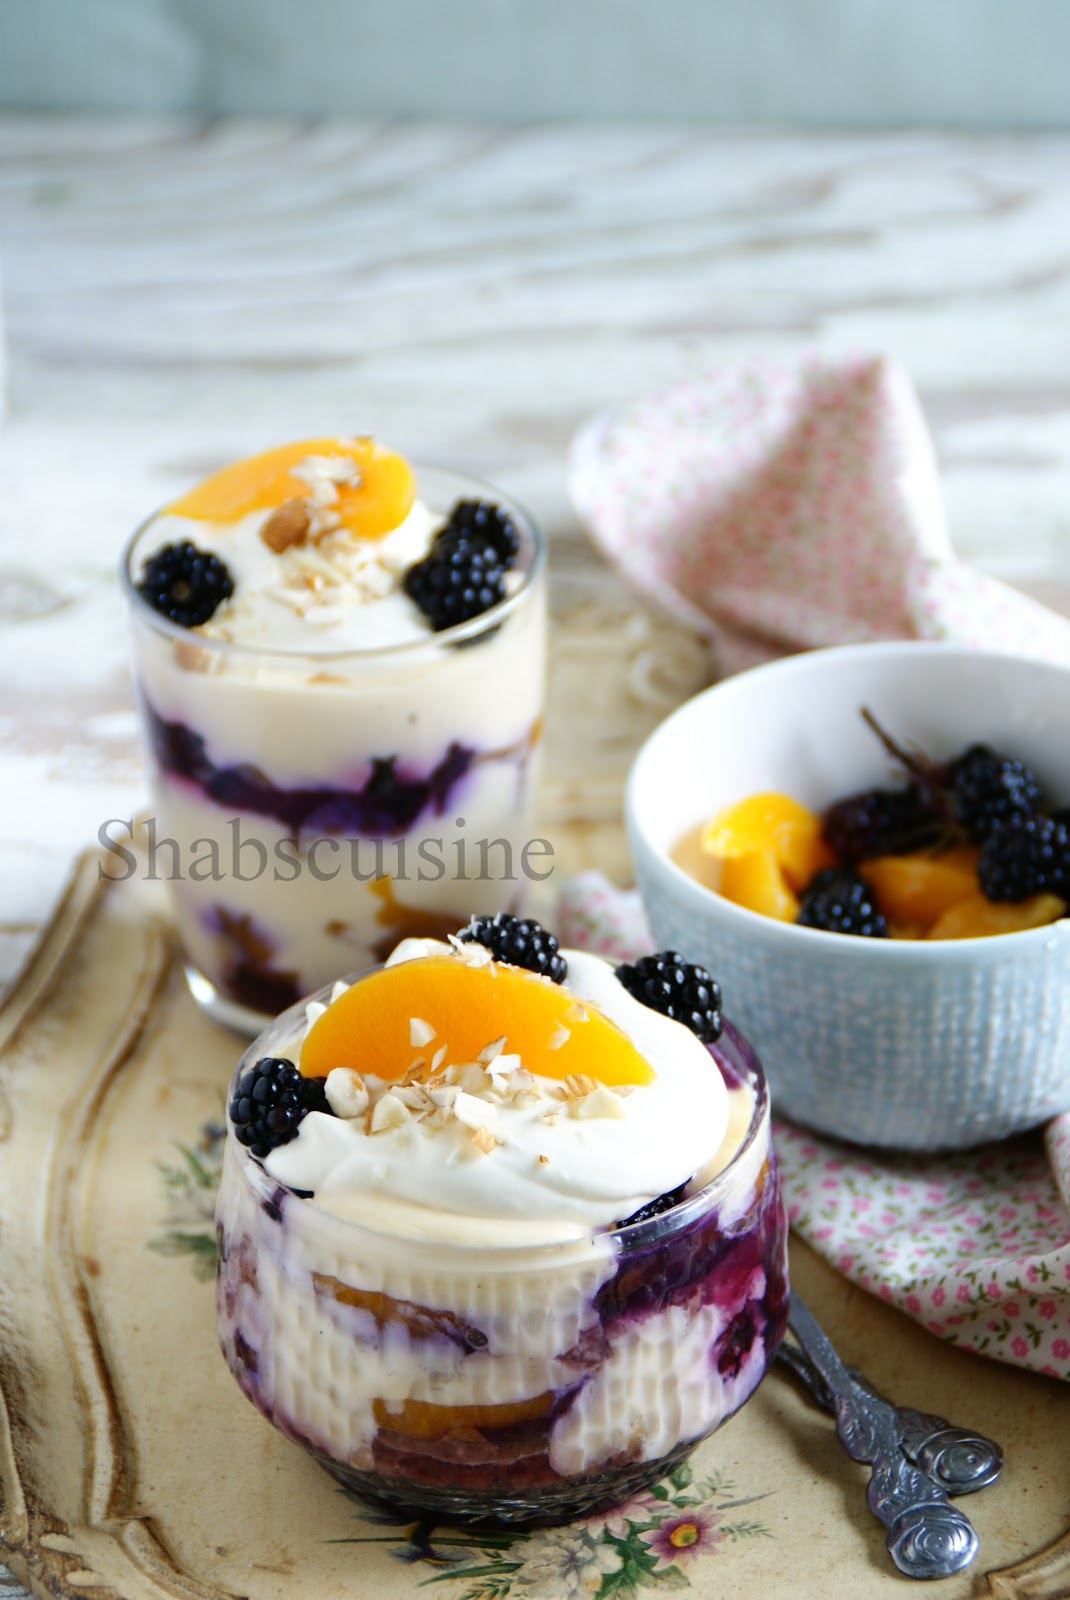
Blackberry and Peach Trifle


A very happy thanksgiving to all of you. Here is something simple if you want to try for this occasion. It’s a bit of a summery treat using peaches and berries, but you can always substitute the fruits with anything of your choice or use canned ones or frozen ones as I did. After all the berry picking that I did few weeks back and making the fresh blackberry ice cream, I was left with thought of what to make with the leftover juicy blackberries. I still had loads of them which I had to freeze later to prevent them from rotting. Blackberries are my favourite berries for baking and desserts and I had a whirlwind of ideas as of what to make with blackberries.


I have already tried few recipes using blackberries including jam, macarons and a crumble cake which are all great. So I wanted to try something different this time. Crumble sounded like a great idea but crumbles and I don’t go well together. I somehow don’t like crumbles and that too after having it from a restaurant recently, I went totally against it. I had lots of egg yolks sitting in the fridge from my macaron baking and some sponge cake that I tried. It had to be something with custard, berries and cake and this trifle was born in my kitchen.

I always wanted to give trifle a go, but I dint plan to make a custard from scratch. As I had lot of egg yolks, I decided to use them up than throwing them away. I have tried making custard before as I always get few egg yolks after baking macarons. If you have good vanilla and use full fat cream and milk, you will get rich tasting, silky smooth custard.


I put them all together just under 40 minutes of which 25 minutes was taken for making custard! It has to be cooked slowly, with much attention and constant stirring. As you are dealing with eggs, too much of heat cooks the eggs and scramble them if you don’t pay enough attention. You really don’t have to make authentic custard here for this recipe. You can use custard powder and make the simplest of custard which is what I wanted to do and would have made it really easy. But I had to save the yolks from binning, so made the custard from scratch.


Anyhow, the recipe is very versatile; you can just play around with any combination of good fruits like grapes, canned pineapple, apples, and berries. You can substitute strawberries for blackberries and you don’t even have to cook it. You can use fruit cocktail that comes in can and use ready-made custard instead of the fresh ones. You can also use dry fruits like figs and dates along with nuts. If you are pressed for time, get a shop bought cake, canned fruits, pre-packed custard and assemble it all together. You can wet your cake with syrup that comes in the can. Nothing can get simpler. But here is a more elaborated version of trifle, with home-made custard for you to try. Peaches and blackberries are one of the best to use together.


Blackberry and Peach trifle
Serves about 10

Ingredients:
300g blackberries (You could use about ½ kilo if you want more berries in your trifle), plus extra for garnishing
1/3 cup of water
¼ - 1/3 cup caster sugar
2 tins of 420g can of canned peaches in syrup
500g pound cake, butter cake or Madeira cake, cut into 1-2 inch cubes

For whipped cream:
300 mls whipping cream/double cream
2 tbsp icing sugar
a splash of vanilla essence

For custard:
5-6 large egg yolks
400mls whole milk
300mls double cream
1 vanilla pod
100g caster sugar
2 tbs corn flour or use 1 tbsp of custard powder for depth of flavour

Preparation:
1.Cut cake into 2 inch pieces.

2. Add blackberries, water and sugar in to a pan and bring to boil, reduce and simmer for 5 minutes-7 minutes until the fruits go soft. Strain and reserve the juice which will be about a cup.

3. Drain the peaches and discard the liquid. Slice the peaches into smaller size if need be.

Make custard:
1. In a sauce pan, heat milk and cream. Split open the vanilla pod, scrape out the seeds and add them to the milk along with the pod. Simmer them to scalding point, i.e. simmer it until the mixture is hot and starts steaming and small bubbles. Do not boil. Remove from heat and then pass this through sieve and leave aside for about 5 -10 minutes to cool it down. Discard the vanilla pod.

2. Meanwhile, using an electric whisk beat together the egg yolks and sugar until it is pale yellow and thick; for about 6-8 minutes. Add in corn flour and whisk again.

3. Pour the milk into the egg mixture in thin stream whisking simultaneously to avoid scrambling the egg from the hot milk.

4. Strain the egg-milk and pour the mixture in a heavy base saucepan and heat it on a very low heat stirring constantly for about 20 minutes to avoid cooking and scrambling the egg. Once the custard gets thick and coats the back of the spoon, take off the heat.  Transfer to another bowl, cover it using cling film to prevent from skin forming. Let it cool completely before layering the trifle.

In another bowl, add icing sugar to whipping cream and using an electric beater, whip until it forms soft peaks. Add in vanilla essence and mix.

To assemble:
1. You can arrange this in a large 2 litre clear glass bowl or small individual serving bowl.

2. Place few pieces of cake as the first layer. Dribble the strained juice of blackberry all over to wet the cake.

3. Scatter some blackberries and peaches over the wet cake

4. Scoop in some custard and level with spoon and repeat the layer once more.

5. Top it up with softly whipped cream and chill for several hours until everything is set.

6. Garnish with peaches, berries and nuts.

Notes: 

I have used warm custard while layering the custard, which was still unset. So the beautiful layers of trifle have not been formed as the custard seeped down through the layers of fruits and cake. If you use custard that is completely cooled, you will be able to see more prominent layers of fruits, custard and cake.

You could also use more fruits. I have used just minimal amount of berries here (300g).

Saturday, 17 November 2012

Egg Bhurji/Burji (Spiced up Indian Scrambled Egg)


Egg burji often sees our breakfast table on the weekends, especially if my lunch is going to be late or we are going out shopping. This is one of the easiest recipes and  was passed down to me by my dear friend Simi Reji, my husband’s friend’s wife. Several years back, they had stayed over at our place while we were in Portsmouth; some six years or so ago when I didn’t blog and I didn’t really cook great. Wondering what to make for breakfast that day, she told me there is an easy recipe that could be made with very little ingredients and in no time. That was when I was introduced to this humble recipe and I have been making this on a regular basis ever since. They are in America now, but I remember her every time I prepare bhurji.


There are several versions of egg burji, but this is how I prepare, how we like it. This is a straight forward recipe, quite easy to make and a versatile one. You can modify the recipe to your liking and throw in cooked vegetables if you fancy. You can also add little bit of ginger along with onions.  Below given is my usual recipe that I make again and again without any modification. I sometimes opt out capsicum if it is not available and adjust the heat in the bhurji depending on the chilli I use. Reduce the chilli powder if you are going to use hot green chilli. As I use mild chilli powder, I add quite a bit of it. You can play around with the recipe; however, it will taste great.


Egg Bhurji/Burji (Spiced up Indian Scrambled Egg)
Ready in 20 minutes
Serves 3-4

Ingredients:
4-6 large eggs, lightly beaten with a tsp or two of water **
1-2 tbsp oil, coconut oil or vegetable oil
1 large onion, 130g, finely chopped
6-8 curry leaves, finely chopped
1 medium tomato, 120g, finely chopped
¼ piece of green capsicum finely chopped
1-2 green chilli
1-1  ½ tsp mild red chilli powder
½ tsp turmeric powder
a pinch of garam masala
2 tbsp chopped coriander leaves.

Preparation:
1. Heat a medium size non-stick pan to moderate heat and add oil.
2. When hot, throw in chopped onions and salt sauté until it is soft.
3. Add in the chopped curry leaves and green chilli if adding and sauté for a minute.
4. Add tomato and cook it covered until soft.
5. Add in the chopped capsicum and sauté for a minute.
6. Add in chilli powder and turmeric and cook on medium heat until the spices are cooked, for a minute or two.
7. Add the beaten egg and let it cook for 30 seconds or so until it starts cooking. Keep stirring, scrambling the egg until it is cooked to preferred consistency. Add a good pinch of garam masala on top and add coriander leaves and mix well.
Serve hot with Toasted bread.

Notes:
I add water while whisking eggs to prevent the burji going really dry. By adding water, you get burji that is slightly wet or not rubbery. But you can opt it out if you like your bhurji to be really dry.

Thursday, 15 November 2012

250th recipe post : Moist Carrot Cake with Cream Cheese Frosting and some Scottish Pictures.


Hope you all had a great Diwali time. I really liked the hype of Diwali celebrations on the social network and the blogs. For me, Diwali is associated with nothing but the Indian sweets and my feeds and updates have been overflowing with bloggers posting Diwali sweets! The amount of sweets that were being cooked by fellow bloggers did tickle my sweet tooth. But I had to succumb myself to a little cake to satiate my sweet craving. During Diwali my dad used to bring home some desi mithais and that is what I missed the most.


This is my 250th recipe post and I would like to thank all my dedicated readers and friends for the constant support and to reach this milestone. Without you this would have been just impossible. Even though my posts come erratically, you supported me and checked on me on regular basis. Thanks to one and all for the continuous support and love. Thank you for making me feel that I have a world of friends who love me unconditionally. Thank you for everything.


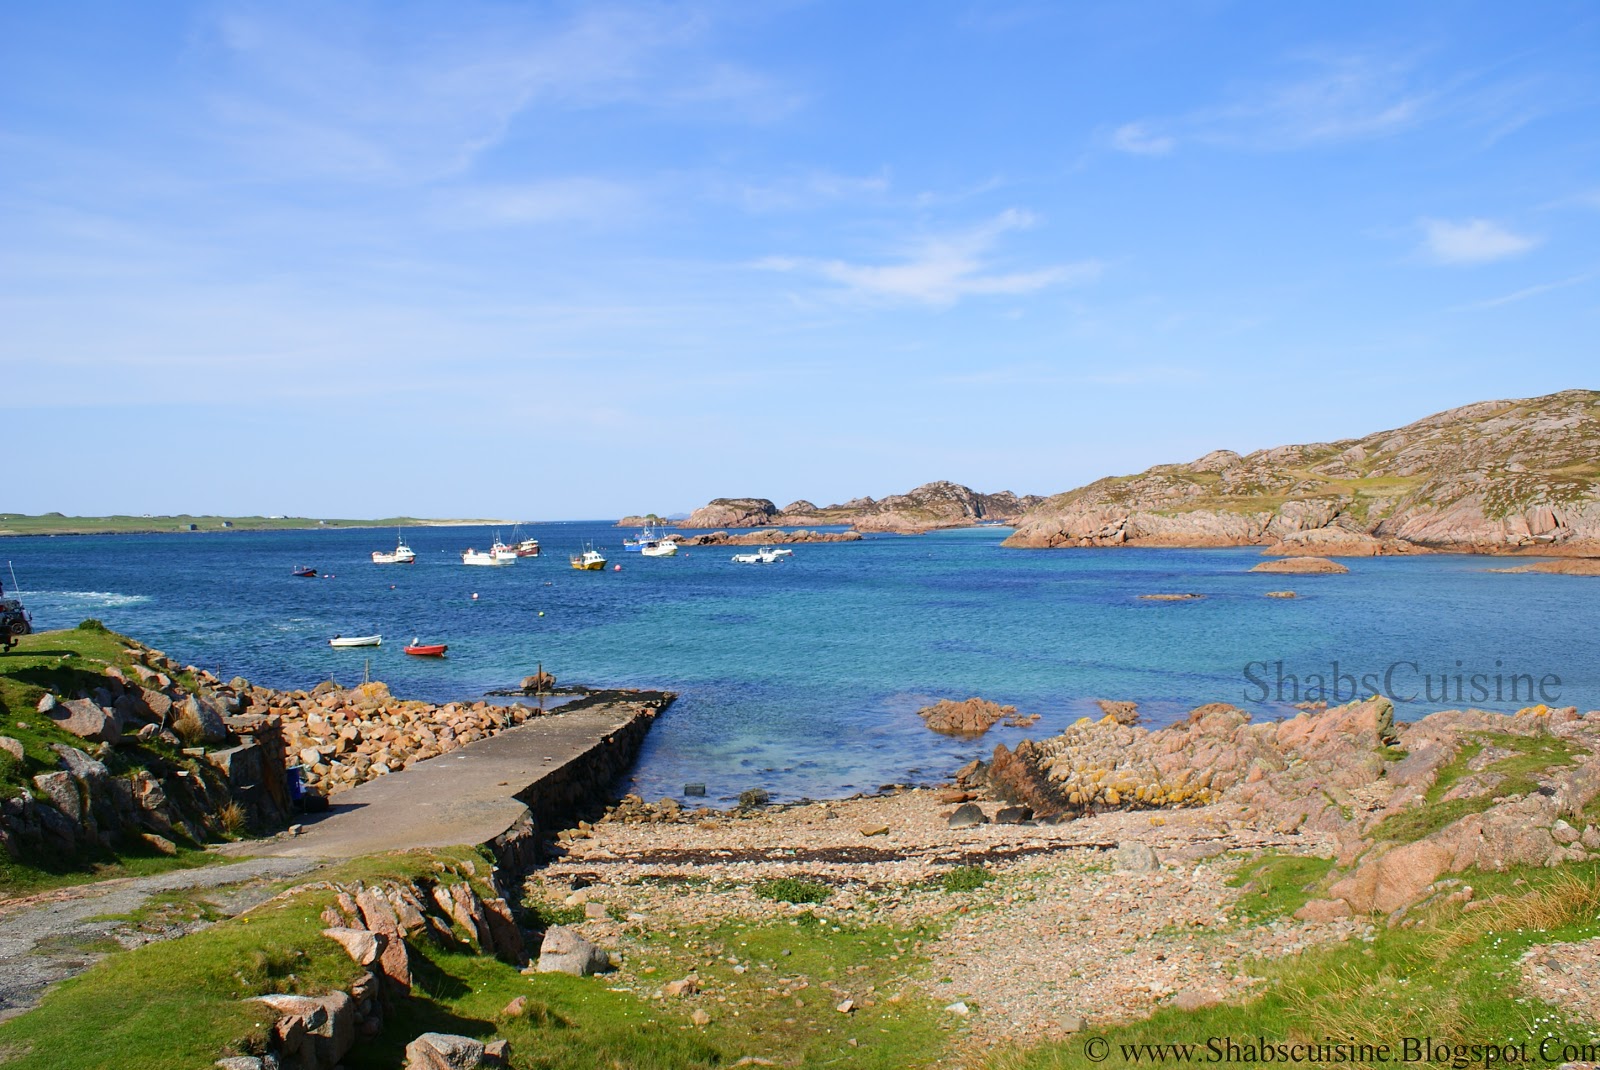
Before I get on to my recipe, let me share you few photographs of few wonderful places that we’ve been to – The Oban, Isle of Mull and Isle of Iona. These are places in the North Western part of the UK, The Mighty Scotland. It is naturally very beautiful place, with stunning landscape and sceneries and lot of history to speak. 


The place is adorned with lakes, castles, mountains, fields etc. It’s just few hours from where we live, the north East. So we tend to drive to Scotland around our anniversary in April. We have covered almost all of Scotland now, visiting all important spots and I am still looking forward to going there again and again. It is just couple of hours drive from our place and a piece of heaven on earth. This time I am going to share some pictures from our last trip, Oban and couple of surrounding islands. I shall cover rest of Scotland in some post later.


We try to take off from our regular routine and travel across the country ones or twice a year. Last year we drove to Oban which is situated in the west coast of Scotland. It’s is about four and a half hours drive from Newcastle and the drive is splendid  with scenic beauty, spectacular landscapes, lakes and mountains. There is much more to discover than just the dramatic landscape for which the Scotland is known for.


Castles, towns, distilleries, islands, villages, sea safari are some of the things you would want to keep in mind when you visit Oban. There is lot to see in and around Oban and two days is too short to go through all of them. But you may choose what you want to do once you reach there. Every hotels and b&b will have many booklets and leaflets of interesting things that could be done around the area, but a detailed search on the net would save you much time. You may also go through the guides and booklets or the official Scottish tourist site for more information.


Oban is known as the ‘gateway of isles’ as the car ferries head for eight islands near Oban. Oban’s largest Ferry operator Caledonian MacBrayne or Calmac do an extensive service in and around Oban. We stayed in a hotel in Corran esplanade in Oban bay overlooking the Kerrera Island which is visible directly from the Oban bay. Although kerrera being a large island, it is less populated and it is quite compared to the busy Oban. As the unofficial capital of the western Highlands Oban has plenty to occupy the visitor.


The 200 year old Oban distillery is right in the town centre. There are two cathedrals though neither is particularly old. St. Johns Cathedral in the town’s main street hosts regular music recitals. As Oban is located with shoreline and hills nearby, it lends itself to plenty of outdoor activities. Charter companies offer boat trips around nearby islands and one could also signup for a kayak outing from the bay. There are also interesting walks in and around the town.  Oban has always been a fishing village and nowadays it is dubbed seafood capital of Scotland and there are plenty of places to enjoy excellent fresh seafood. We spent our first day roaming in oban and the next day we set off to Isle of Mull and Isle of Iona, two very beautiful islands near Oban.


Isle of Mull is 40 minutes ferry crossing from Oban and is worth exploring two impressive castles nearby. Torosay is a Victorian mansion with extensive gardens and Duart castle, guarding the Sound of Mull. Mull’s western side is dotted with white beaches. You also get to see white tailed sea eagles and otters and it is a good place for a whale-watching trip. Once we got off the ferry, we drove around the Island covering not all, but most of the area. We could not cover the Northern part of the Island, Tobermory which is famous for its brightly coloured buildings. The kids television series Balamory was shot in Tobermory. We took another ferry to Isle of Iona, which is one of the smallest islands, but beautiful in all its sense.


Isle of Iona is an idyllic and enchanting island situated just a short ferry ride from Isle of Mull. It takes a bit of planning reaching Iona, as it involved a ferry ride from Oban to Isle of Mull and then a road trip to the Fionnphort where we take another ferry to Iona which takes just about 10 minutes.


Looking from the Mull’s southern corner, the tower of St. Margarates Cathedral. part of Iona Abbey dominates the skyline.  The Abbey is the main tourist attraction in Iona. Cars are not allowed in the Island and the abbey is just fifteen minutes walk from the port. 

The island is less populated with just about one hundred and twenty people. So, I guess everyone in the island would know each other! It is one of the most serene, tranquil places I have ever been to and we all left with a feeling of tranquillity. There is also a heritage centre on the island that reveals more about the historic past and culture. You can take ferries or boats to other islands nearby from there.

...................................................................................................................................................................


Coming to the recipe, this gorgeous recipe was baked to take over to our friends place when lot of friends were meeting up. I always wanted to bake this cake, but the amount of fat and sugar that went into the cake put me to a halt. I thought I will wait for the right occasion to bake, usually when the friends get together for dinner.

The dinner that day was planned late, so the cake also was baked at the last minute. And I blast cooled the cake by leaving it at the window sill, leaving the window open! I dint have time for the cake to cool down completely, so I frosted whilst the cake was still warm. As I started taking pictures, I noticed the frosting dribbling down slowly as the frosting started melting! I had to hurry taking pictures, but I think that oozing frosting added an extra chic to the cake that was simply great.


I had been rushing through out that day as we were running late for the dinner unlike usual and it was just halfway through our journey, that I remembered I had forgotten the cake at home! Aargh! After all the rushing, chaos and stress I left the mighty cake at home. It was a total disappointment as I knew I would be nibbling on the cake all day which I did and the whole point of splitting the calories between friends failed miserably. However, the husband and son enjoyed it much. Although, they had only reasonable amount of them, the rest being all eaten up by the sweet tooth monster, me.


The cake is really soft, flavourful and the cream cheese frosting makes the cake absolutely scrumptious. This is a massive cake, so you would too want to bake it for a time when you have a big gang coming over to your place. Or else if you have a sweet tooth family, make it for them. Enjoy.


Moist Carrot Cake with Cream cheese Frosting
Recipe : Allrecipes
Prep: 30 mins
Cook: 1 hour
Serves: 18 

Ingredients:
4 medium eggs
300ml vegetable oil
400g, 2 cups caster sugar
2 teaspoons vanilla extract
250g, 1 ½ cups plain flour
2 tsp baking soda
2 tsp baking powder
1/2 teaspoon salt
2 teaspoons ground cinnamon
350g, 2 large carrots, grated very fine
125g, 1 cup chopped pecans or walnuts
1 tbsp grated zest of an orange

Cream Cheese Frosting:
125g butter, softened
250g  cream cheese, softened
250g  icing sugar
1 teaspoon vanilla extract

Preparation method:

1. Preheat the oven to 180 ºC, 160 ºC for Fan assisted oven. Grease and flour a 23cm/9 inch baking tin.

2. In a large bowl, beat together eggs, oil, caster sugar and 2 teaspoons vanilla for couple of minutes using a wire whisk or a wooden spoon

3. In another bowl, sift in flour, baking soda, baking powder, salt and cinnamon.  Add this to the wet mixture and fold well.

4. Stir in carrots, orange zest and fold in pecans. Pour into the prepared tin.

5. Bake in the preheated oven for 45- 55 minutes or until a skewer inserted into the centre of the cake comes out clean. Let cool in pan for 10 minutes, then turn out onto a wire rack and cool completely.

To Make the Cream cheese frosting: :

In a medium bowl, beat together butter and  icing sugar until creamy. Gradually add in cream cheese and vanilla essence and beat until the mixture is creamy. Set aside until ready to frost. Once frosted, refrigerate the cake.

Spread evenly on the cake once the cake is completely cool. This is quite a stiff, spreadable frosting.

*Mine started melting as I frosted it on slightly warm cake.

Notes:

1. While making frosting, butter should be silky soft and smooth. If not, the frosting will be grainy. Here, the butter is not soft even at room temperature, so I microwave for few seconds or until it is really soft. If at all your frosting goes lumpy from cold butter, heat it for a brief amount of time in microwave making sure  it does not melt. Mix well.

2. I also place the cream cheese in few layers of kitchen towel to drain extra moisture in the cheese to make stiff frosting